
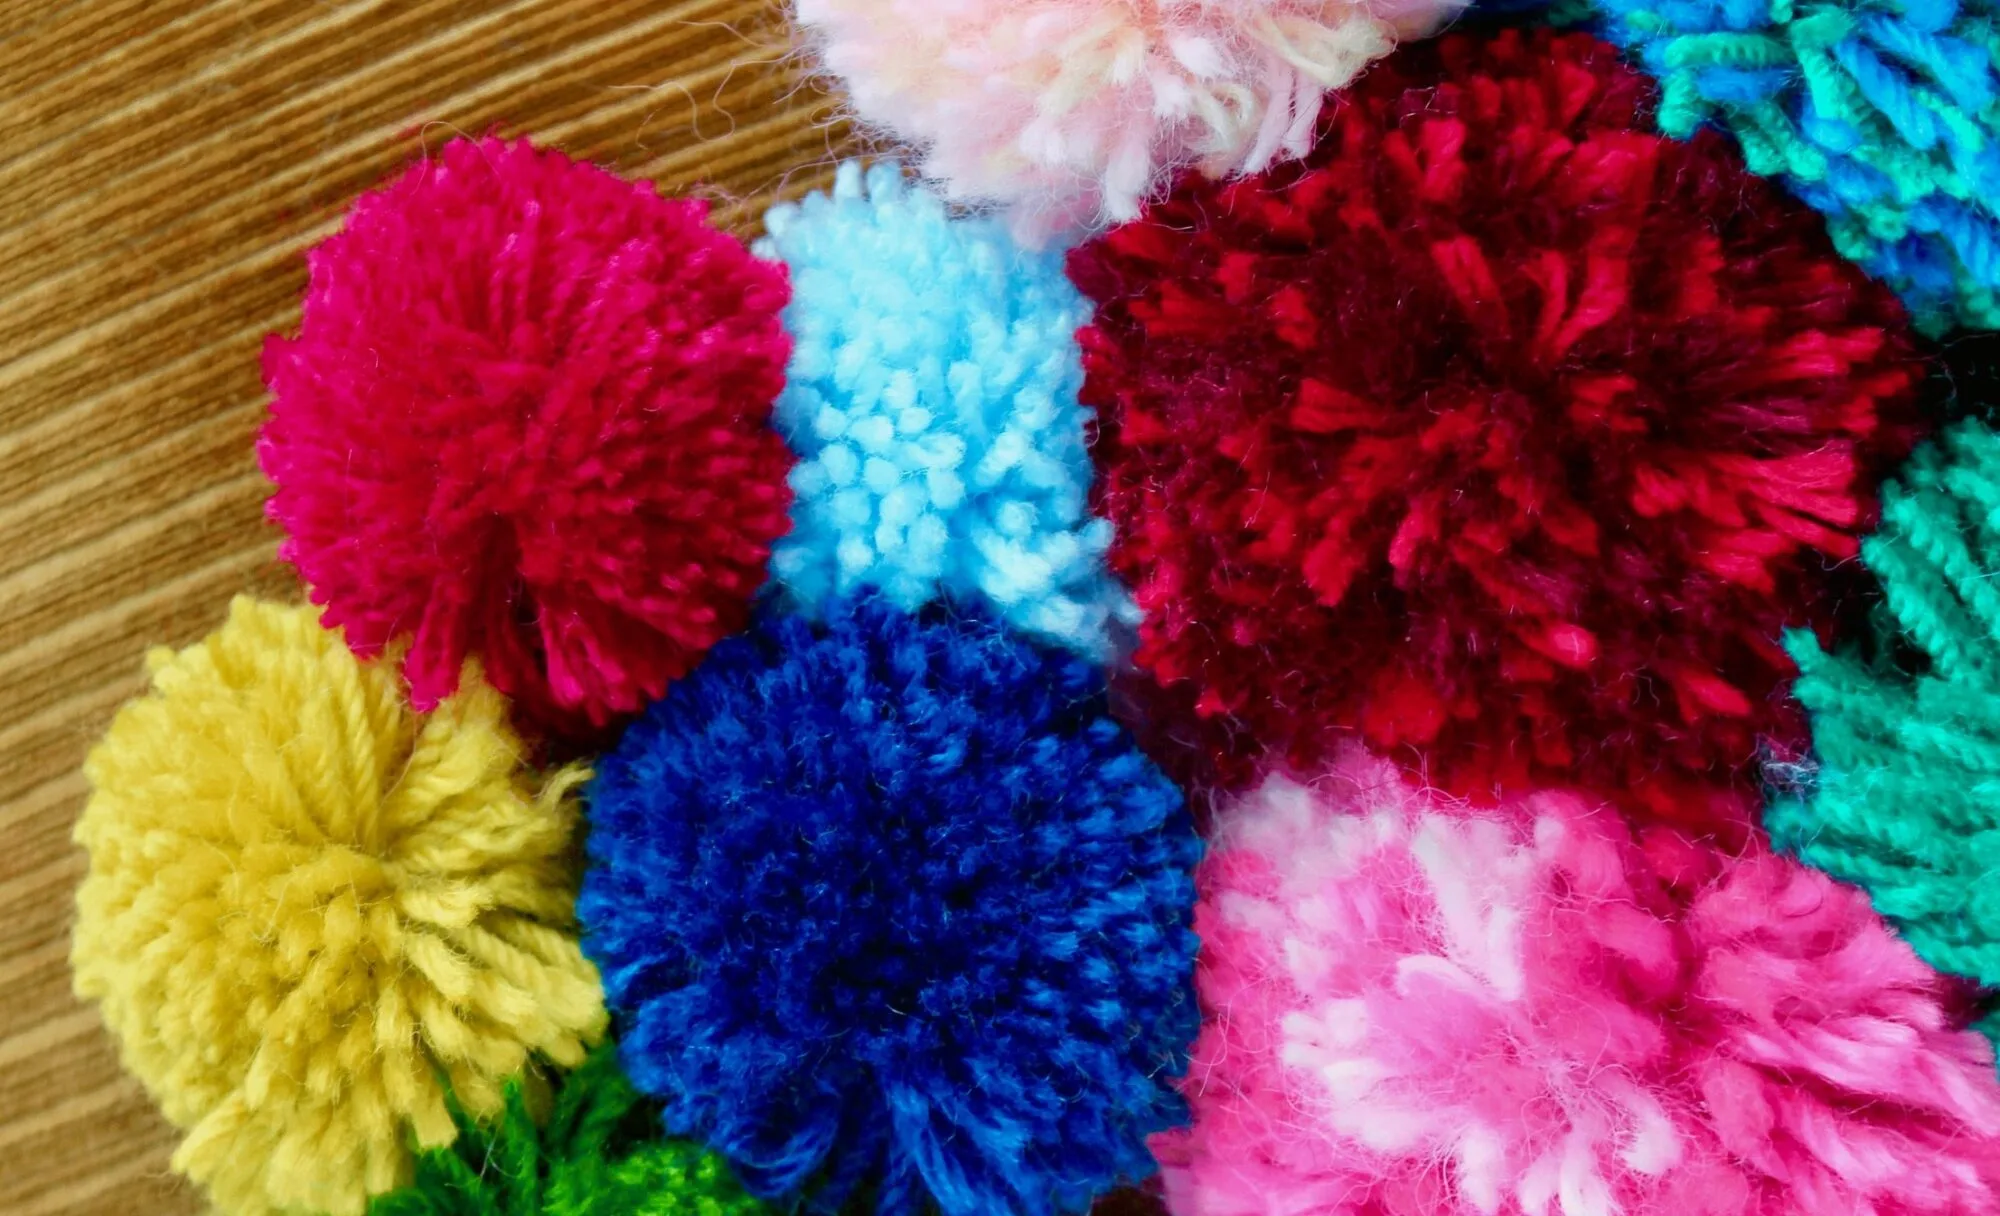
If you have kids, or are a serious crafter, learning how to make pom poms out of yarn is a must. Don’t you agree?
With that said, if you’re having flashbacks from a kid when you were taught how to make pom poms using those flimsy cut out cardboard circles, I feel you. It would take forever just to wrap the yarn around the circle! This is especially a pain if you have to create a lot of mini pom poms.
Don’t worry though. There’s a super quick and easy way to make multiple poms in the time it would take to make just one with those crazy cardboard circles.
Even better, this tutorial has no cardboard involved. You won’t have to cut a single piece of cardboard for this project (no toilet paper rolls!). Yay! Instead, you’re going to learn how to make pom poms with just your fingers and yarn. Plus, you can make the poms poms different sizes, based on the yarn that you would like to use.
Without further ado, here’s our super cute, quick and easy tutorial for how to make them with your fingers. Strap in, you’re about to become a professional pom-pom maker!
How to Make Homemade Pom Poms Out of Yarn
What You’ll Need to Make Pom Poms
Below is your step by step guide for making yarn pom poms. As well as a list of all the things you will need:
What can you use to make this craft?
- Yarn in your favorite color (Two packs of medium weight yarn should be enough yarn)
- Sharp scissors
- The best tool ever, your hands and fingers!
Instructions for making these Pom Poms
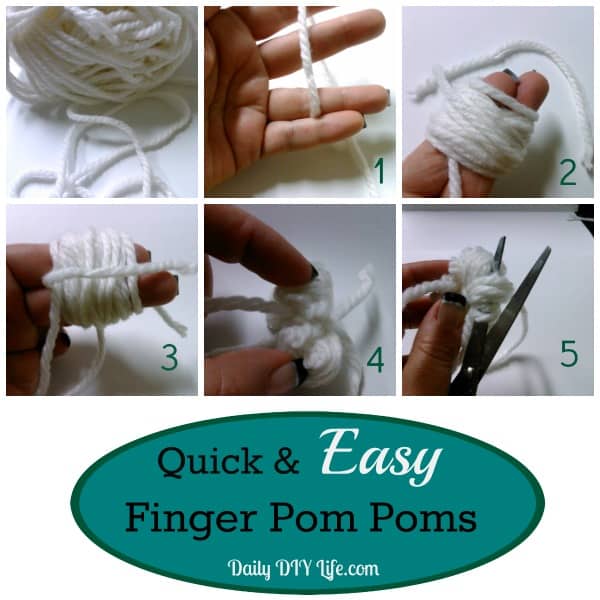
- Place the tail of the yarn between your ring finger and your pinky just to keep the yarn in place while you wrap.
- Wrap the yarn around your index finger and your middle finger. 20 times. (The more you wrap it the more full it will be. You can also choose to wrap around 3 or 4 fingers to make bigger poms.) Cut your yarn. Use your pair of scissors to cut a separate piece about 6 inches long. You can trim this later.
- Push the 6 inch piece between your 2 fingers bringing both ends up in a V shape. Carefully wiggle the loops off your fingers.

FOLLOW DAILY DIY LIFE ON PINTEREST!
- Tie a tight knot in the center of all your loops.
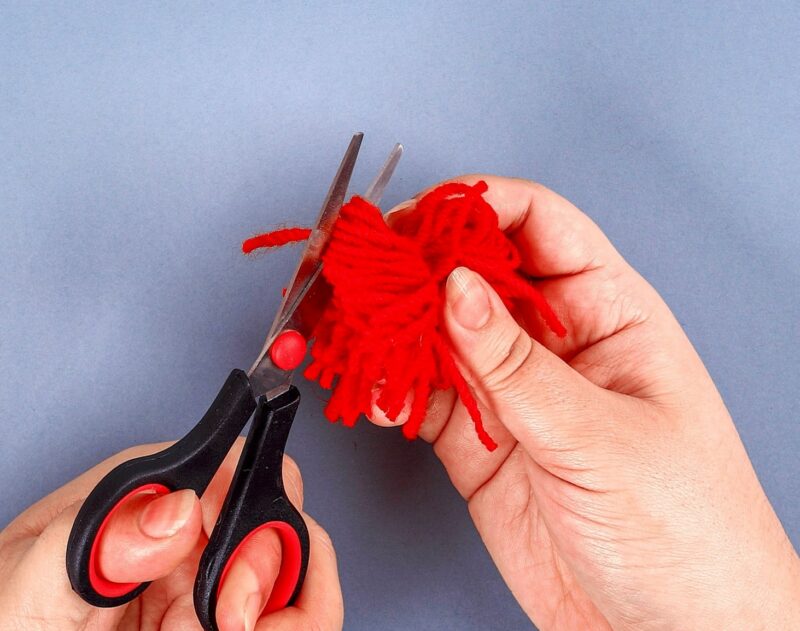
- Snip in the center of each loop on both sides. Trim your strands of yarn so it is even all the way around.
The Easiest Way to Make Fluffy Pom Poms
Now if you want to leave your wool or yarn pom poms like that, you’re good to go! But what if you want to to a little something extra and make them extra fuzzy?
I came across this method one night while browsing crafting posts and landing on a Youtube channel with a video that blew my mind. Trust me, you’re going to love this technique.
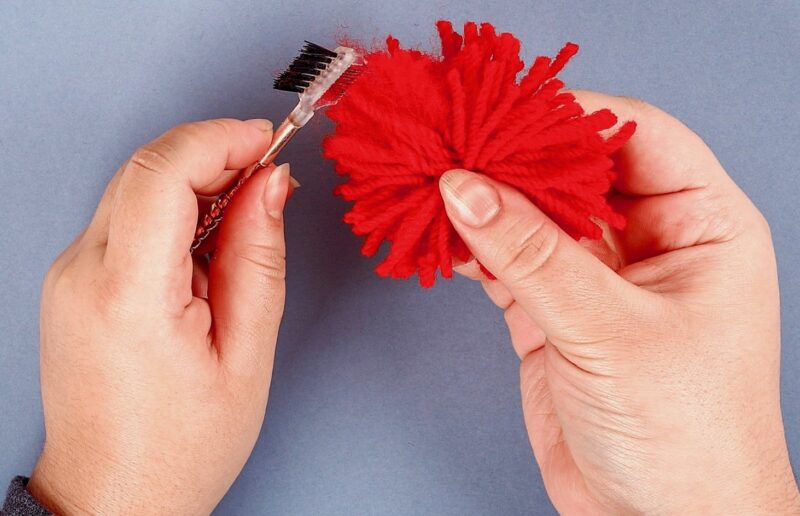
Let’s be honest, regardless of how great at making your own pom-poms you are using the traditional method, your pom poms are never quite as fluffy as the dense pom poms that you can get at the craft store. Follow the below instructions to to bring your pom poms to the next level.
- When your pom pom is complete, you’re going to take a fine comb (see image) or just a little fork and start brushing out the ends of the yarn. Do one piece of yarn at a time to better control the length and edges of the yarn.
- Then, you’re simply going to fluff out the edges of the pom-pom with your fingers and trim any stray pieces of yarn.
Behold, the perfect pom pom! That is all there is to it. A perfect fluffy little circle of happiness that takes about 5 minutes to make from start to finish.
How to Use Your Homemade Pom Poms
There are so many different uses for these pom poms. Below are a few different ideas depending on the sizes of your pom poms.
- Dress up a store-bought hat by placing a large pom pom on top (Make sure to secure the middle of the pom-pom).
- Attach a small or medium pom pom at the end of a string to create a fun toy for your cat.
- Sew large pom-poms interspersed on a different color of yarn. Do this six or seven times and attach to your wall for a fun piece of DIY art!
So now what are you going to do with them all after you make these diy pom poms? Well, here is what we decided to do with ours.
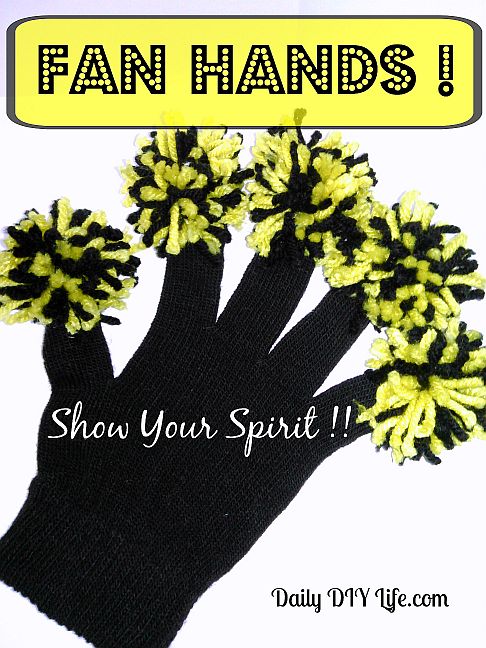
Once we got a pile of 10 pom poms made, we chose to hot glue them to the top of each finger on the glove. We did try to sew the pom-poms on with a yarn needle, but I found the yarn slid right through the knit in the gloves. I used a low-temperature glue gun, put the gloves on my hands and glued each pom pom right on top of my fingernail area.
This way your fingertips were free to hold that delicious cup of hot cocoa at the football game to warm you right up.
That is one heck of a way to show your team spirit that’s for sure. They are even cute in black and gold, but would look so much better in silver and blue. A complete pair of these adorable little fan hands took less than 30 minutes to put together from start to finish.
This is one of my favorite crafts I have done recently. I hope you agree. Not a sports fan? That’s ok! These would be super cute in princess colors with tiny pom poms on the tips.
I hope you have enjoyed today’s craft project! If you would like to see more Daily DIY Life crafts (especially if you have excess yarn), be sure to visit our craft page for more inspiration (including sewing and crochet projects).
More Craft Ideas
Create Your Own Coffee Bar Decor
Dollar Tree Fall Decor Using Foam Pumpkins and Pre-Made Signs
Whimsical DIY Glitter Fairy Jars


You are kidding me! I had no idea they were this easy to make! Easy to follow tutorial. Love it!
Thanks Crystal! It really is THAT easy 🙂 The kids would enjoy doing it too. I’m thinking a Christmas pom pom wreath now. Have a great weekend!
I LOVE those spirit finger gloves!!!! Thanks for linking up to Show Me Saturday. Hope to see you there again this week!
Hi Ginger! Thanks for stopping by. They are a fun project for sure.
Omg! The whole extra step of fluffing them out at the end makes all the difference!!!!