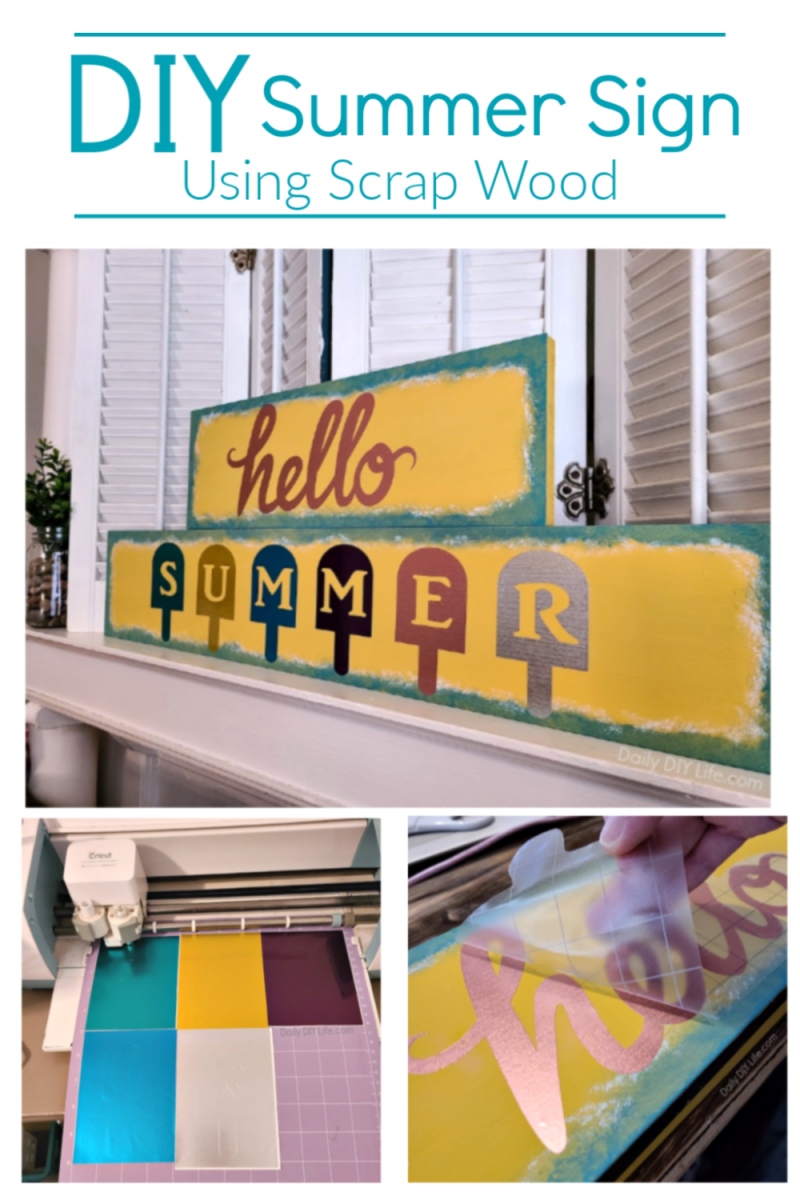
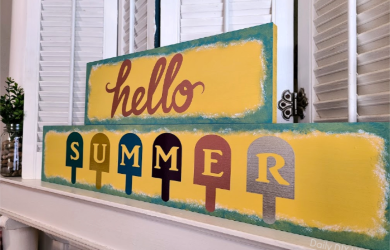
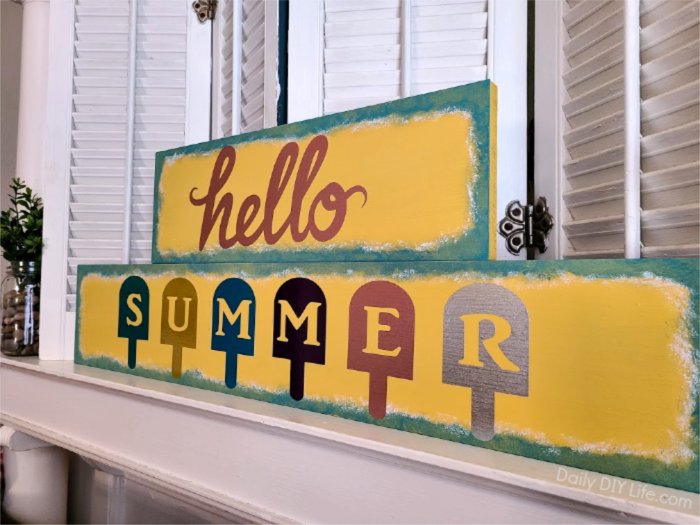
Add a splash of color to your seasonal decor with this fun, bright Summer sign made from scrap wood and your Cricut cutting machine. An easy Cricut project just in time for summer crafting. Polished Metal vinyl from StyleTech Craft gives this piece a little extra shimmer.
This is an easy summer DIY project that you can have done in just an afternoon. Use a bright-colored acrylic craft paint on a few old boards, then personalize them with your favorite summertime saying using durable polished metal vinyl. It couldn’t be any easier.
Colorful Summer Sign with Scrap Wood – Pin It For Later!
Follow Daily DIY Life on Pinterest!

I am thrilled to be a part of the new 2020 StyleTech Craft design team. This project is sponsored by StyleTech Craft. I have received product and compensation for the purpose of this post. All project ideas and opinions are 100% my own.
This post contains affiliate links for your convenience. That means that if you click on a link within this post and a purchase is made, I will receive a small commission at no extra cost to you. For full details, please see our disclosure policy.
Stop by and check out our sponsor! There are some incredible projects and lots of inspiration on their pages as well!
StyleTech Craft Official Website
Facebook StyleTech Craft Facebook Page
Instagram Styletech Craft IG Page
DIY Summer Sign Using Scrap Wood
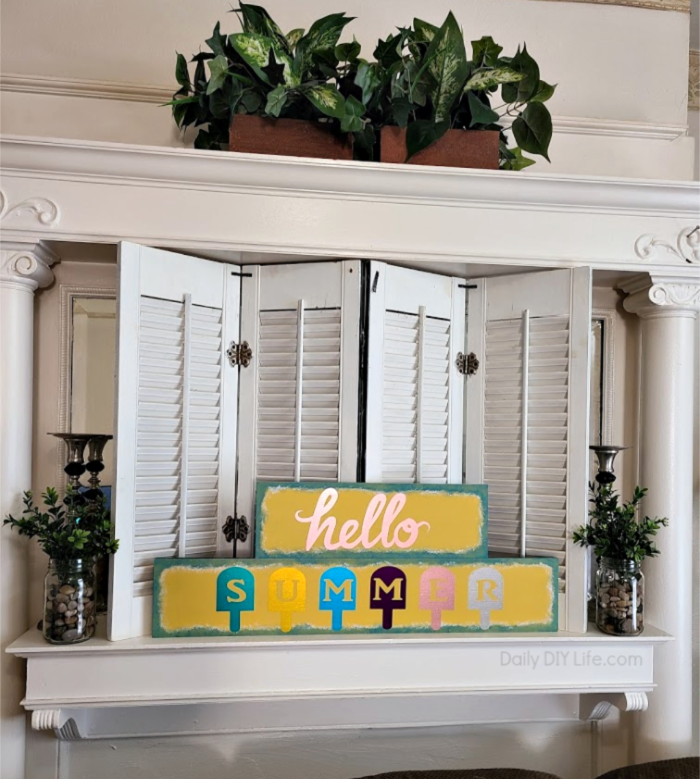
As I am writing this post, I am one of the millions of people that are working from home and practicing social distancing. I thought I would add a bright, colorful sign to my home and bring in a bit of summertime cheer. If I have to stay home and look at the walls, they should make me smile!
Use Scrap Wood For Your Next DIY Project!
When I decided to make this fun summer sign for my home, I looked to the teens for some scrap wood. They are forever buying and scrapping furniture. Luckily my oldest had just taken apart an old desk and had a few pieces that were the perfect size for my new sign. Here is how I did it.
Supplies Needed For A Bright Summer Sign
- Scrap Wood
- Bright Acrylic Craft Paint
 ( I used teal blue and bright yellow)
 - Foam Paint Brush
- Medium Stencil Brush for the edges (optional)
- Cricut Cutting Machine
- StyleTech Craft Polished Metal Vinyl
- Transfer Tape
 ( I used teal blue and bright yellow)
 for the edges (optional)

How To Assemble A Summer Sign Using Scrap Wood
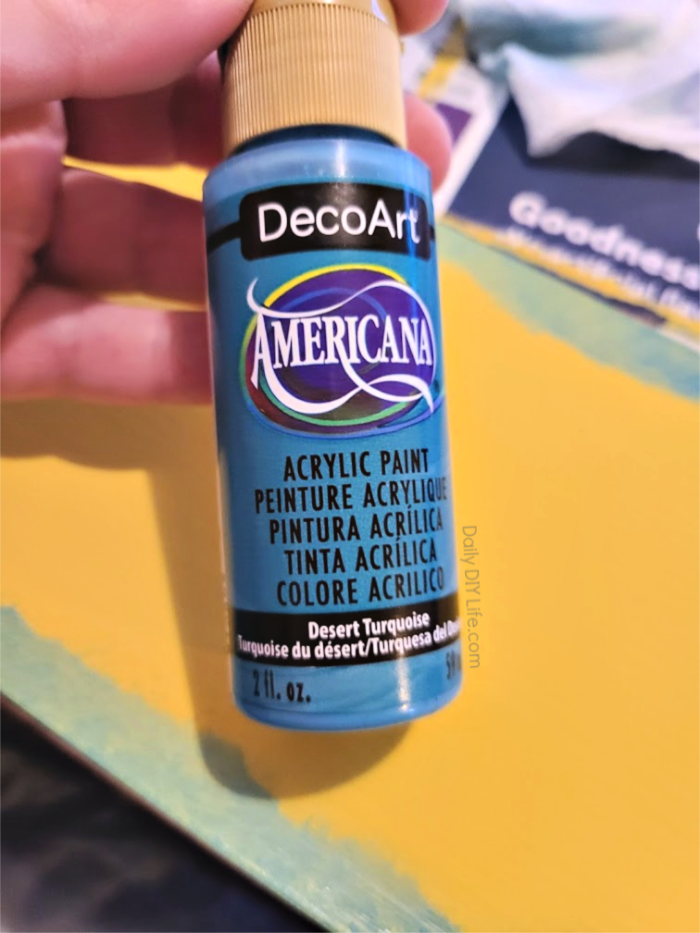
Before you can put the vinyl on your beautiful summer sign, you will need to give your piece(s) of scrap wood a few coats of paint. I used bright yellow paint that just reminds me of the summer sunshine. To add another color and bring in a bit more color, I used a stencil brush to do the edges with Desert Turquoise blue and a thin line of white just to make the letters pop.
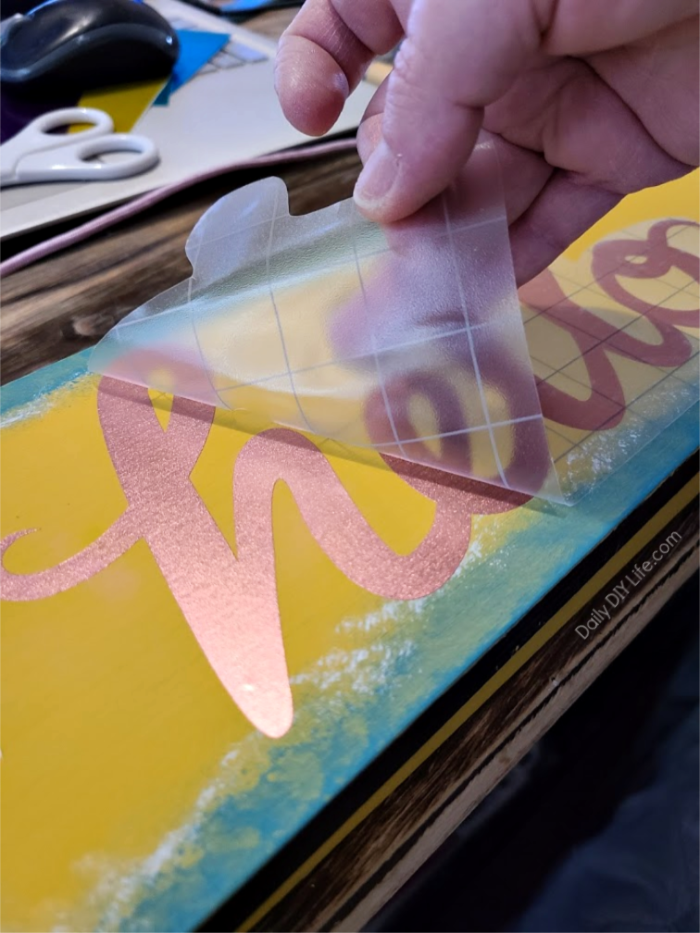
Once the entire board(s) is completely dry, it is time to add your vinyl.
I found all of my images for my Cricut Explore right in the Design Space data base. They are free for personal use if you are a subscriber.
Since I used so many different colors, I wanted to be able to cut them all at once on the same mat. Here is an easy way to do that.
How To Cut Multiple Colors With Your Cricut Using One Mat
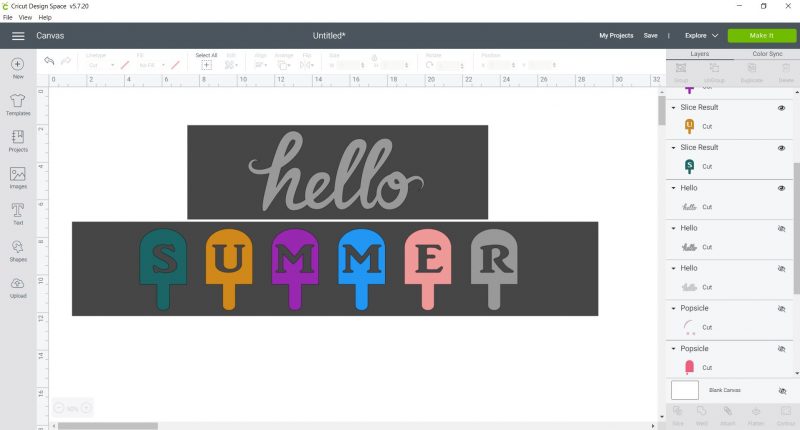
Step 1: Create your original design in Cricut Design Space. When you create a design in design space, each color will be placed on a separate mat for cutting when you click the “Make It” button. Use the following steps to create an image and have each color cut on one mat at the same time.
Step 2: Once your image is completely designed to your liking, it’s time to rearrange, place and separate all the colors. If your image is a group or a group of text, you will first want to ungroup the image. This will make each part of the image or each letter in a text its own image. Rearrange each image in design space so that they are side by side but leaving space between each image. I like to leave about one inch all the way around each individual image.
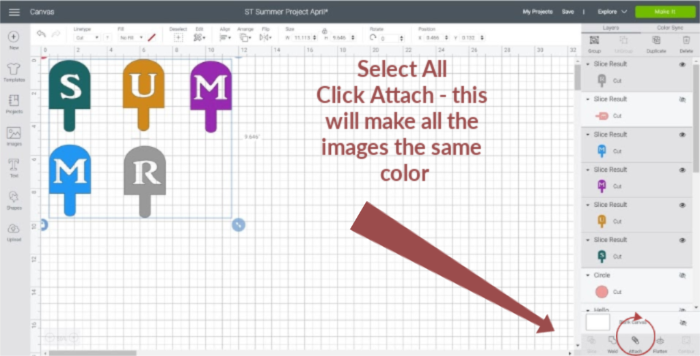
Step 3: Once they are all organized and separated, you will want to “select all” then click Attach. You will notice that once you click the attach button this will change all of your images to the same color. Having them all the same color basically tells Cricut that they will be all on the same mat. One color = one mat.
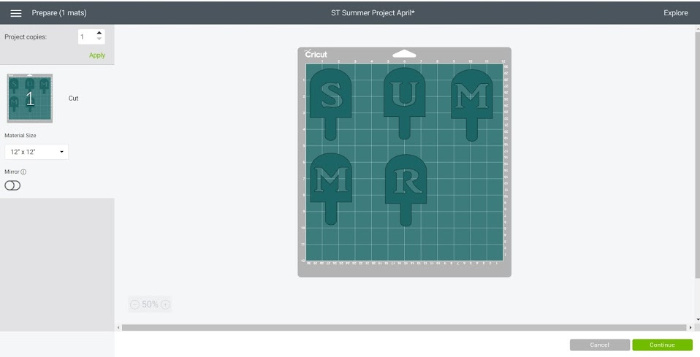
Step 4: Click on Make It – you will see each image on the next screen all on the same mat. This is where you will take the extra time to make note of the measurements of each image before you cut your vinyl. Use the gridlines that are shown to determine the size of the vinyl that needs to be cut for each image. I can’t stress enough just how important it is to take the time to cut your vinyl accurately. For this project, I placed each image in a 4″ x 5″ rectangle so they will all fit side by side with very little waste.
Important – All materials must be the same for this to work. Since you can’t switch your settings mid-cut, you need to make sure they are all the same material for each mat that you use. For example, you don’t want one image cut in vinyl and one cut in faux leather. Your cut will not be accurate and may not cut at all.
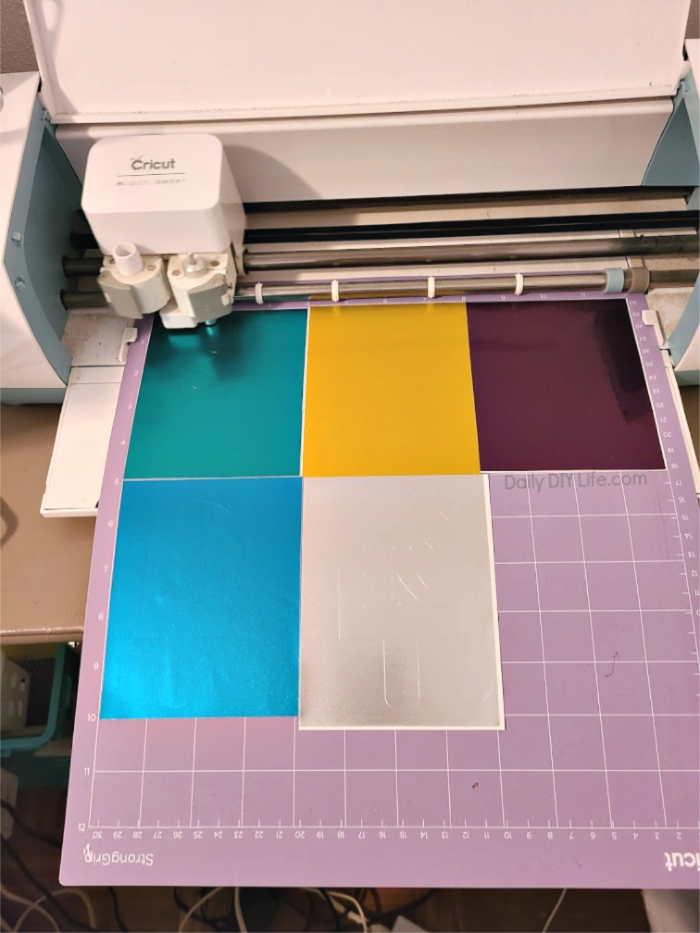
This is how my mat looks with each separate color.
Step 5: Once your cuts are complete, remove your vinyl from the mat. Weed and remove all excess and transfer your design to your project.
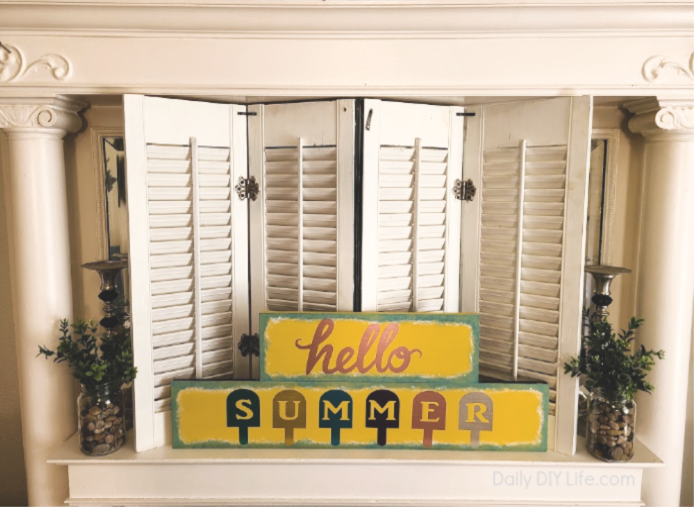
Finished Project – Colorful Summer Sign Using Scrap Wood and My Cricut!
I just love how the bright colors stand out against my otherwise very neutral decor. The polished metal StyleTech Craft vinyl adds just the right amount of shine without being overpowering.
If you decide to make your own summertime sign, I would love to see it! Stopover to our Facebook Page and share your work. I can’t wait to see just how creative everyone gets with making your own signs using scrap wood, or any materials you may have around your home.
If you love this post, be sure to Pin It For Later!