
We all have one or two (or ten) pieces of furniture that we absolutely love, and never want to part with. Even if those beloved pieces have gone past their prime. Instead of replacing all of the pieces that are outdated, why not give them a face lift? You will be pleasantly surprised what a little paint and the right materials can do for an outdated piece of furniture. Using a beautiful stencil, you can add style, class, and even give your piece its own bit of character. Grab a nice cup of coffee and let me show you how to easily update old furniture with cutting edge stencils.
Update Old Furniture Using Stencils – Pin This Project For Later!
Follow Daily DIY Life on Pinterest!
Before I show you just how easy it was to transform these cute little side tables, I would like to tell you how I ended up with them not once, but twice. These tables originally belonged to my grandmother 20+ years ago. After she passed away, they were given to me. I had them in my home for a few years, until we made the big decision to move out of state, taking next to nothing with us along the way. I didn’t want these tables to just go to anyone, after all, they were very special to me so they had to go to someone that was also very special to me.
I gave the tables to my girlfriend Amy. I knew they would be fine with her, and she would love them just as much as I did. To my surprise, when she came to visit about a year later, she brought these sweet little side tables to me in the back of her truck. I was shocked and happy more than I could possibly express in this post. I had my grams tables back, and my dear sweet friend made sure of that. I love you Amy! xo
With all of that being said, the tables had seen better days that’s for sure. I didn’t want to get rid of them of course and moving them from room to room trying to find a spot for them was getting a little old. I knew it was time for a quick furniture update so I could incorporate them into my current decor.
Over the last few months, I have shared with you several ways I have been updating the outdated pieces around my home. Everything from the Rustic Patina Finish on a pair of old trunks, a repurposed magazine rack turned Dog Toy Storage, even our bright and fun Blue Bedroom furniture we updated. This update was a little different since I have never worked with a stencil on furniture before, I was super excited to give this one a try.
A special Thank You to Cutting Edge Stencils for sponsoring this post. We received the stencils at no cost for the purpose of this post. All opinions and feedback is 100% our own.
**Stay tuned after this post for a great giveaway sponsored by Cutting Edge Stencils. Enter for your chance to win one of these beautiful top quality stencils.
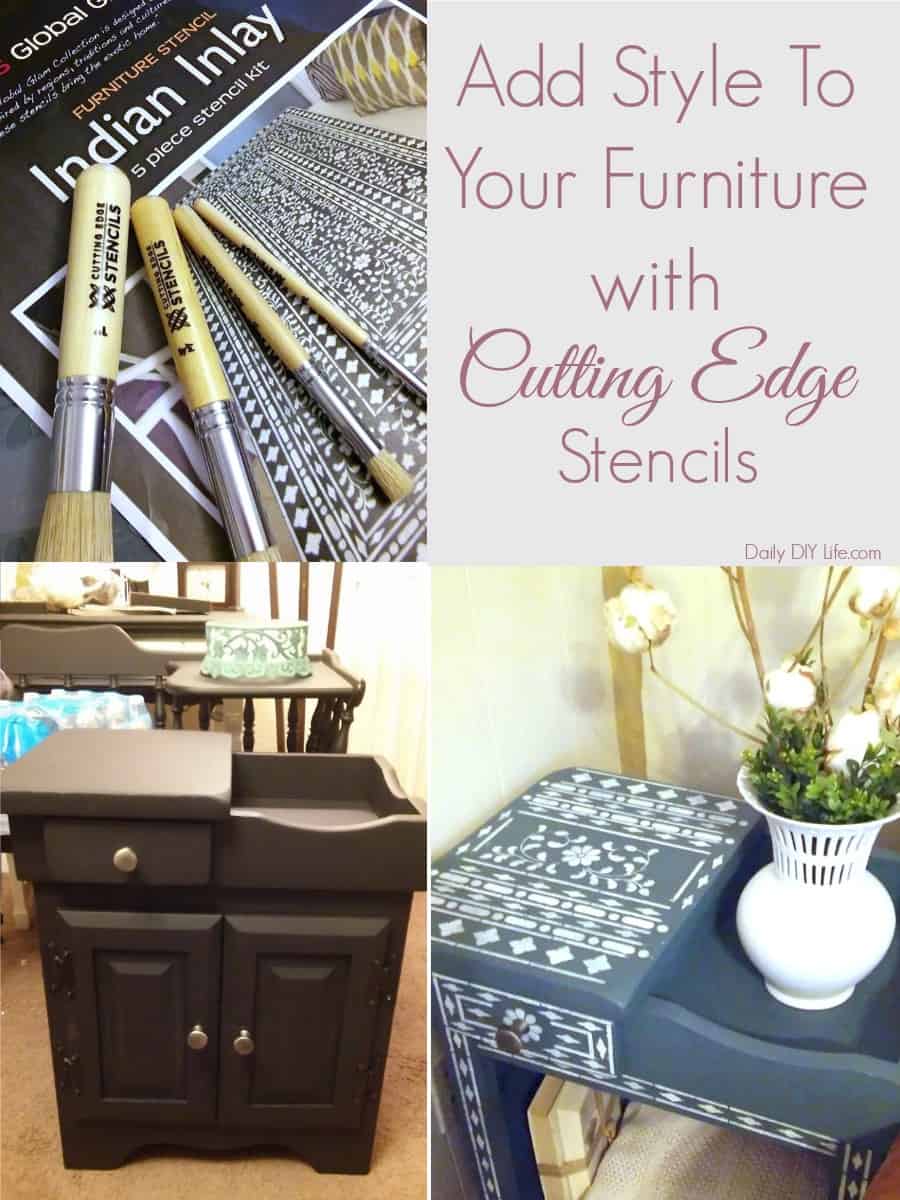
Before this beautiful table was given its update, it was very plain and stained with a strange, almost orange color stain. Unfortunately, I did not get any before pictures. The ones I did have on my phone I deleted a few months ago after I attempted to paint it black. The first update did not turn out so well. The paint was not smooth and it left a chalky finish on it that would collect every dust particle in my house. I did, however, take a photo of the table in all its black chalkiness!

I did like it this way, but like I said, I just couldn’t get past the texture of the paint. It was just off. So once again it was stuffed into a hall until I decided to make it come to life with these gorgeous Cutting Edge stencils.
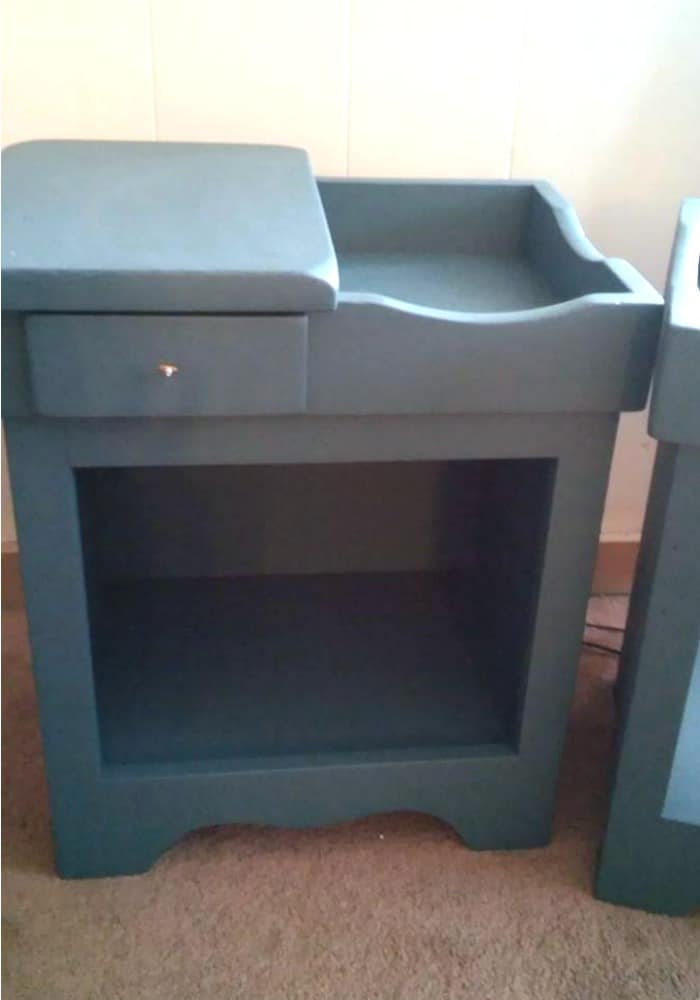
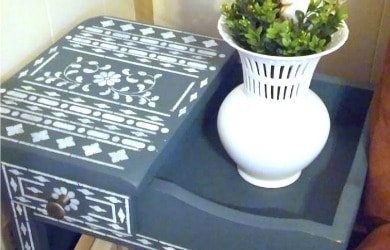
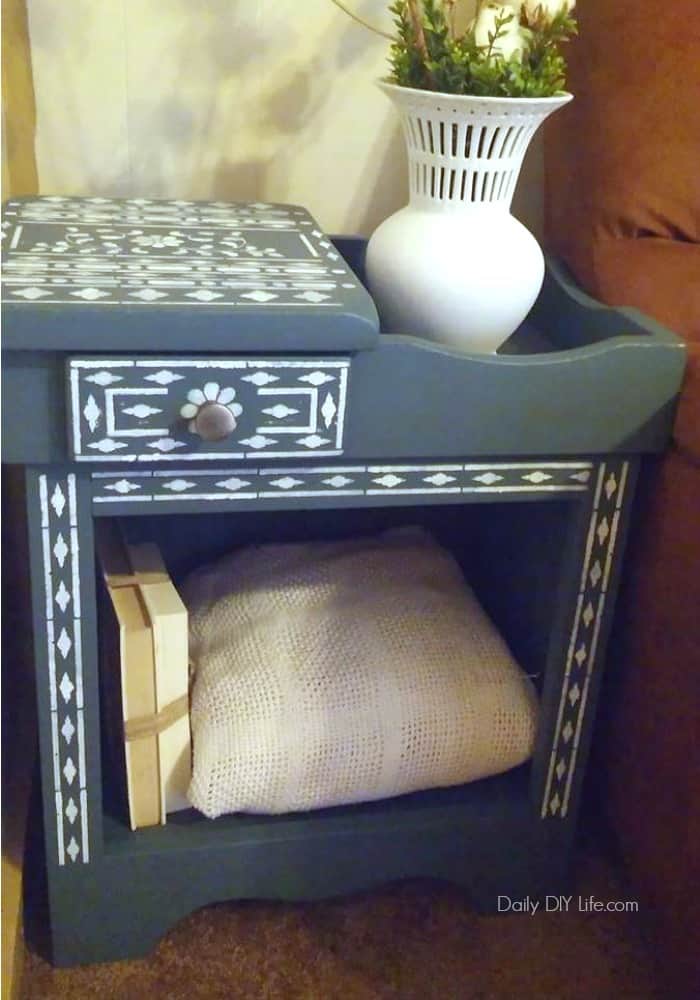
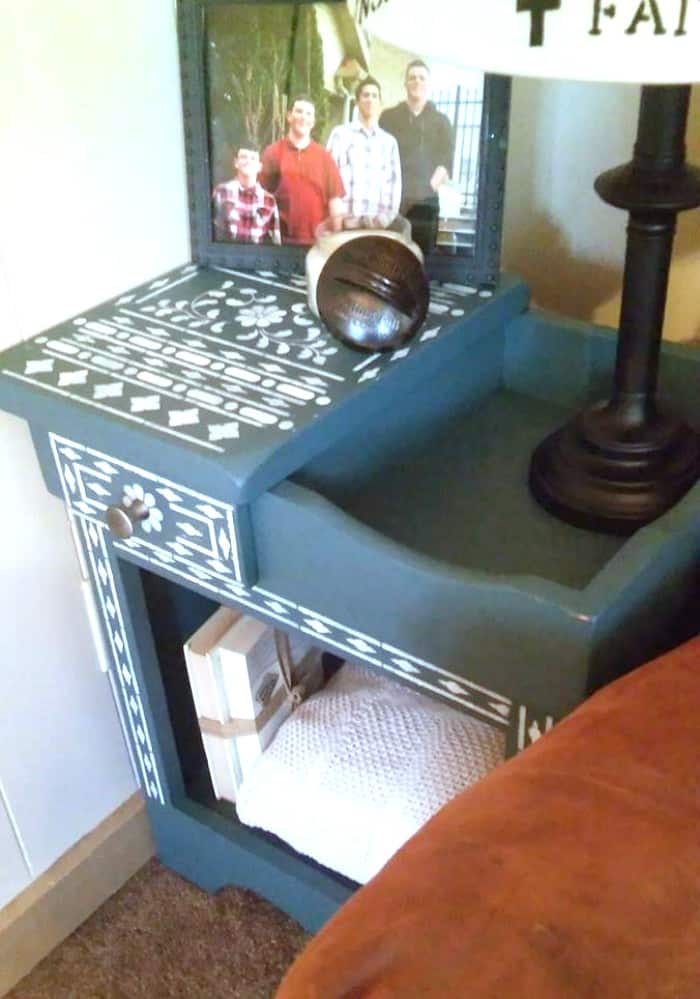
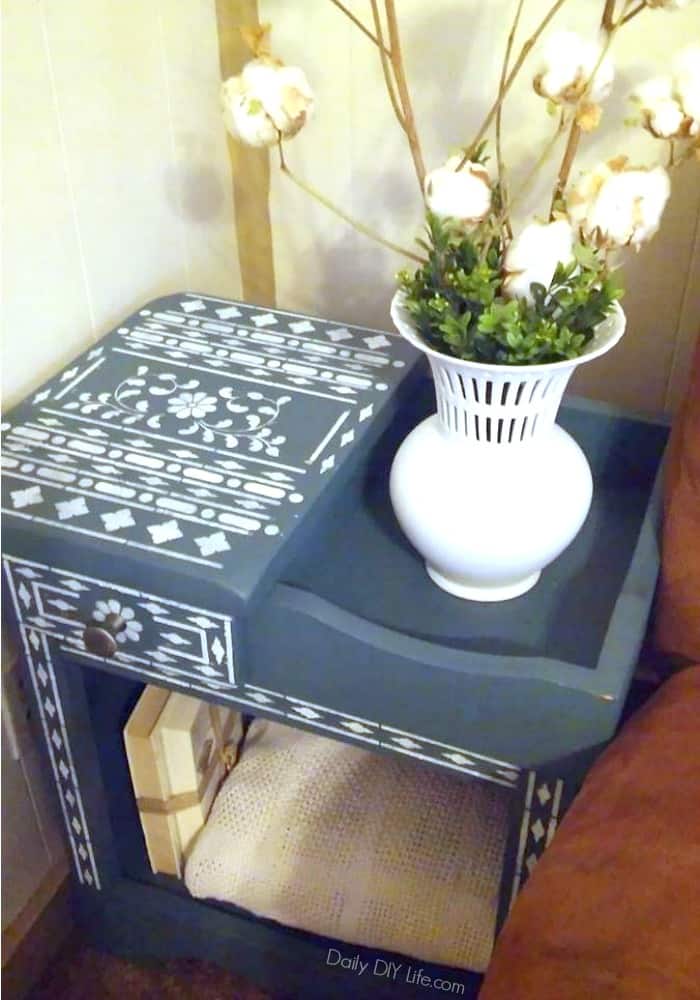
I removed the doors from both of the tables. Something about having an open base gave it that much more charm. Both tables got a coat of Homestead Blue paint. The same paint we used to update our coffee table last month. Yay! We now have a matching set.
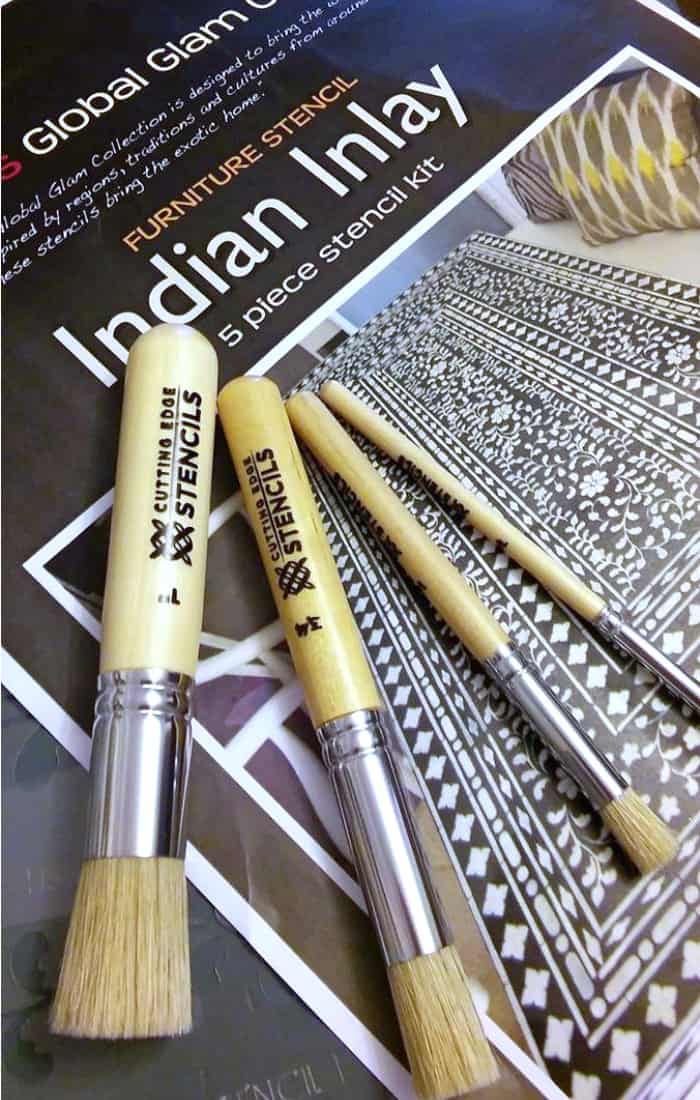
Once the paint was dry, I was able to play with the Indian Inlay stencil set to see just how I wanted the design. This particular stencil set comes in 5 pieces. You can really customize the layout and design of any piece large or small.
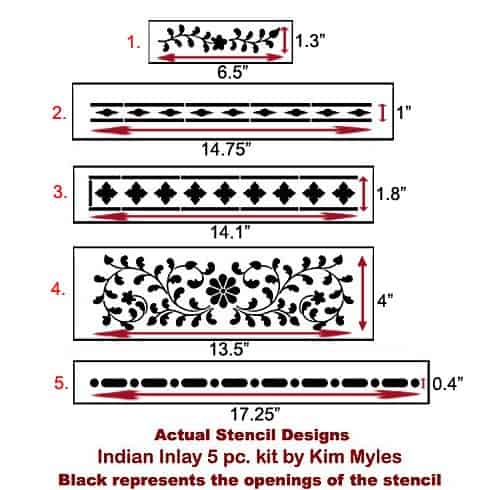
I loved the geometric designs mixed with the floral. The fact that I could mix and match to fit the piece I was stenciling was perfect.
The tops of the side tables got a mixture of floral and geometric design. Using the stenciling brushes from Cutting Edge Stencil, I was able to get the clean, covered look I was trying to achieve.
- Tip – After dipping your stencil brush in paint, wipe off almost all of the paint onto a paper towel. This will help with bleeding under the stencil and creating rough edges.
- Tip – Use painters tape or spray adhesive to hold the stencil in place.
- Tip – When using a stencil brush dab the paint onto the surface instead of swiping. Swiping a brush over the stencil will also cause bleeding under the stencil.
- Tip – Cleaning your stencil – The stencil will eventually accumulate a thick layer of paint after many repeats, so it will have to be cleaned. You can let it dry completely and simply peel off the paint skin, or you can give it a brief soaking in a tray or tub of water and then wash off the paint. Best cleaning method we have found is to place the stencil on a flat surface like a large baking tray, and scrub it with a dish cleaning brush under running water.
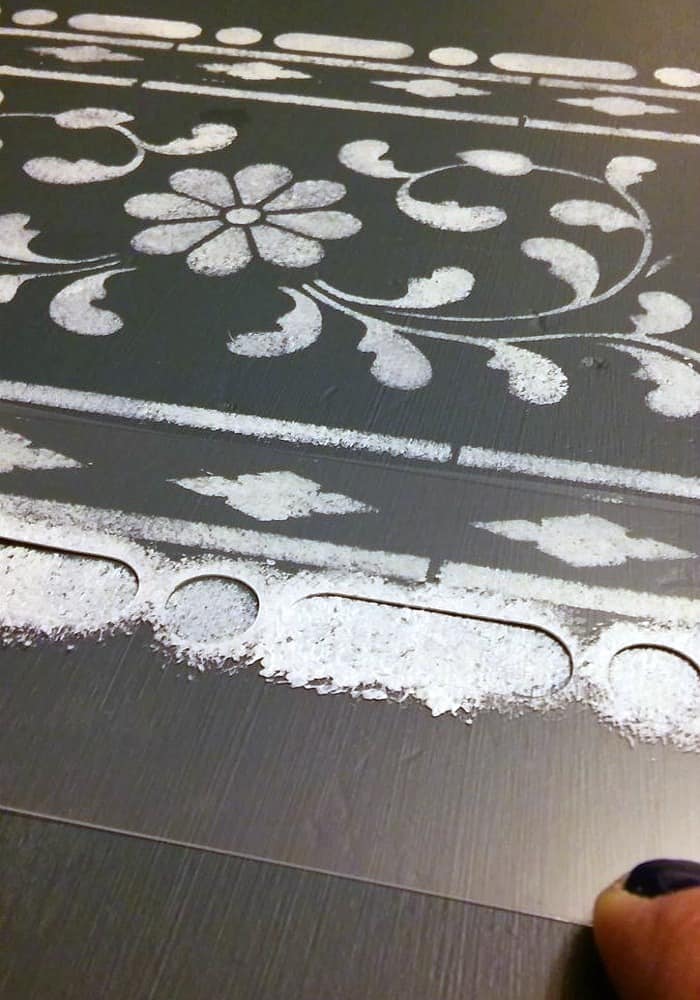
This stencil is 100% transparent. I loved the fact that I could see the design areas I already completed so I was able to get a clean straight line for the next section.
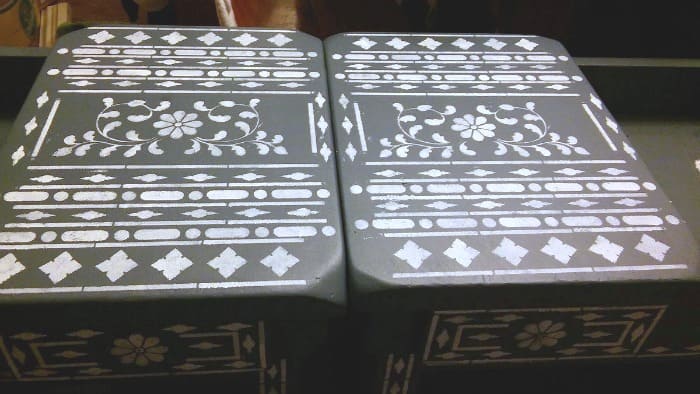
I worked on the tables side by side, so the designs would match perfectly. The lighting was terrible, when I took this photo they really are blue and not black as they look above, yikes! Not too bad of a job if I do say so myself. The transformation of these sentimental side tables is amazing. I owe it all to the high-quality stencils, and a little bit to the love I have for these tables, and what they mean to me.

If you love stencils as much as I do, you will want to check out the other talented bloggers that also took part in creating beautiful works of art using Cutting Edge Stencils.
The Chelsea Project –
Time for a giveaway!!!
In the comment section below, leave a comment telling me what your favorite stencil design is by visiting Cutting Edge Stencil’s website. Open to US and Canada only, please. One winner will be chosen randomly and will receive $50 towards the stencil of their choice from Cutting Edge Stencil’s website. Good luck! The folks over at Cutting Edge will coordinate the prize once the winner is chosen.
** Pin it for later **


I just love how this turned out Heather. What a beautiful transformation! I love their SERENITY ALLOVER STENCIL and would love to win one!
This just turned put so nice. I love these tables to begin with but the stencils really take them up.another notch. The painting is perfect!!
At first glance the stencil pattern you used looks complicated but then when you explained it and showed how you can place them, it really is a lot easier than I imagined. Now your grandma’s tables have a very special custom look as a nice tribute to her and all your memories. The tables are actually quite a steal the show look now.
Love what you did to these tables. They look awesome now. I checked out Cutting Edge and am in love with their vines all over stencil.
Oh my gosh, this stencil package looks just like inlay! It’s amazing. The colors you chose work beautifully together, too! Your Grandma”s tables now look brand new! Congrats on a great makeover! Oh…and I think I’d like the Sara Trellis All over stencil. And — Thanks for sharing the great directions, too.
I love the Prosperity Mandala Stencil. Oh, the things I could do with that!
love this look!
Prosperity Mandala Stencil is my favorite
Love all the moroccan ad mandala stencils…. tough choice!
Love your table.. and how it looks like inlay. I love the moroccan stencils and the mandalas…. tough choice.
I love the pattern of the stencils and the color you picked for the tables, just beautiful!
It’s amazing what paint and stencils will do for old furniture. I love how your project turned out!
Thanks for sharing at Funtastic Friday!