
Personalized DIY Father’s Day Gift – Pin It For Later
Follow Daily DIY Life on Pinterest!
![]()
As part of the StyleTech Craft design team StyleTech Craft design team, products and compensation have been provided for the purpose of this post. All projects, thoughts, and opinions are 100% my own.
This post contains affiliate links for your convenience. That means that if you click on a link within this post and a purchase is made, I will receive a small commission at no extra cost to you. For more details, please see our disclosure page.
Using Your Cricut Cutting Machine For Personalization
Personalizing gifts and home decor can be very easy when you are using your Cricut . For best results make sure to use the correct vinyl for each project.
Matte Removable Vinyl  is great for walls and home decor.
Transparent Glitter Vinyl is perfect for glassware and mirrors.
Permanent Glossy Vinyl is the best choice for car decals and projects that you don’t plan to change.
Polished Metal Vinyl  is just right when you want something permanent with a bit of an edge and polished shine.
When cutting vinyl, always use a sharp blade and a clean mat
 . This applies to any cutting machine, not just your Cricut. Vinyl is thin and can tear if not cut properly. Follow the manufactures instructions for different types of vinyl.
How To Make A DIY Personalized Father’s Day Gift
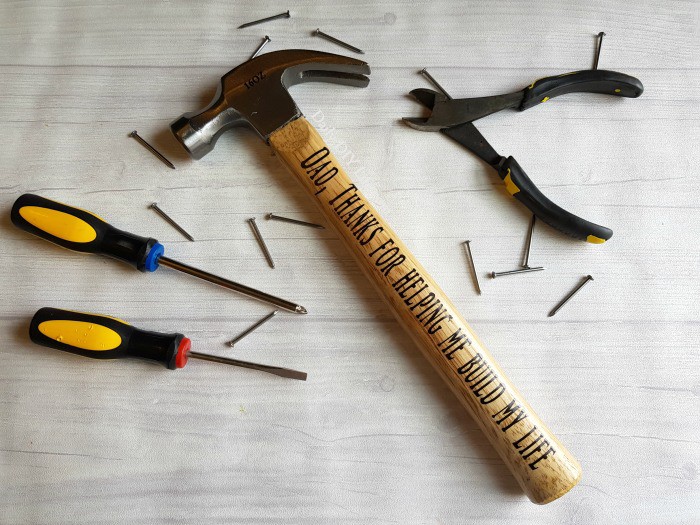
Supplies Needed:
- Hammer
- StyleTech Craft Polished Metal Vinyl
- StyleTech Craft Transfer Paper
- Cricut Cutting Machine
How To:
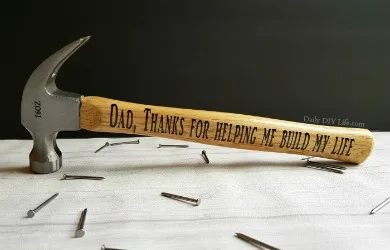
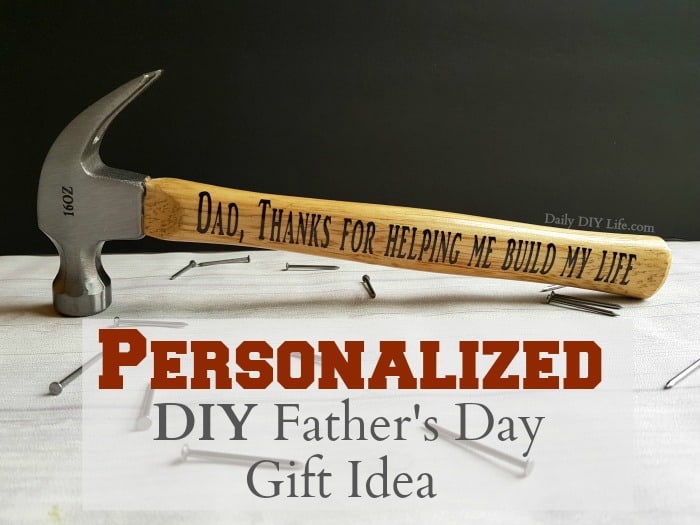
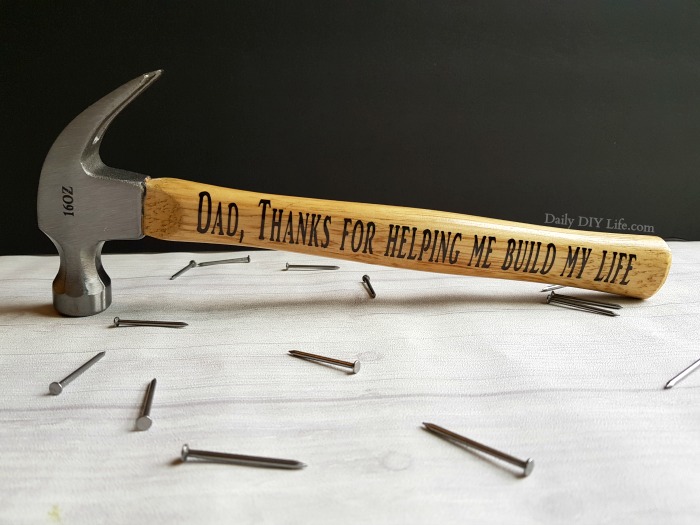
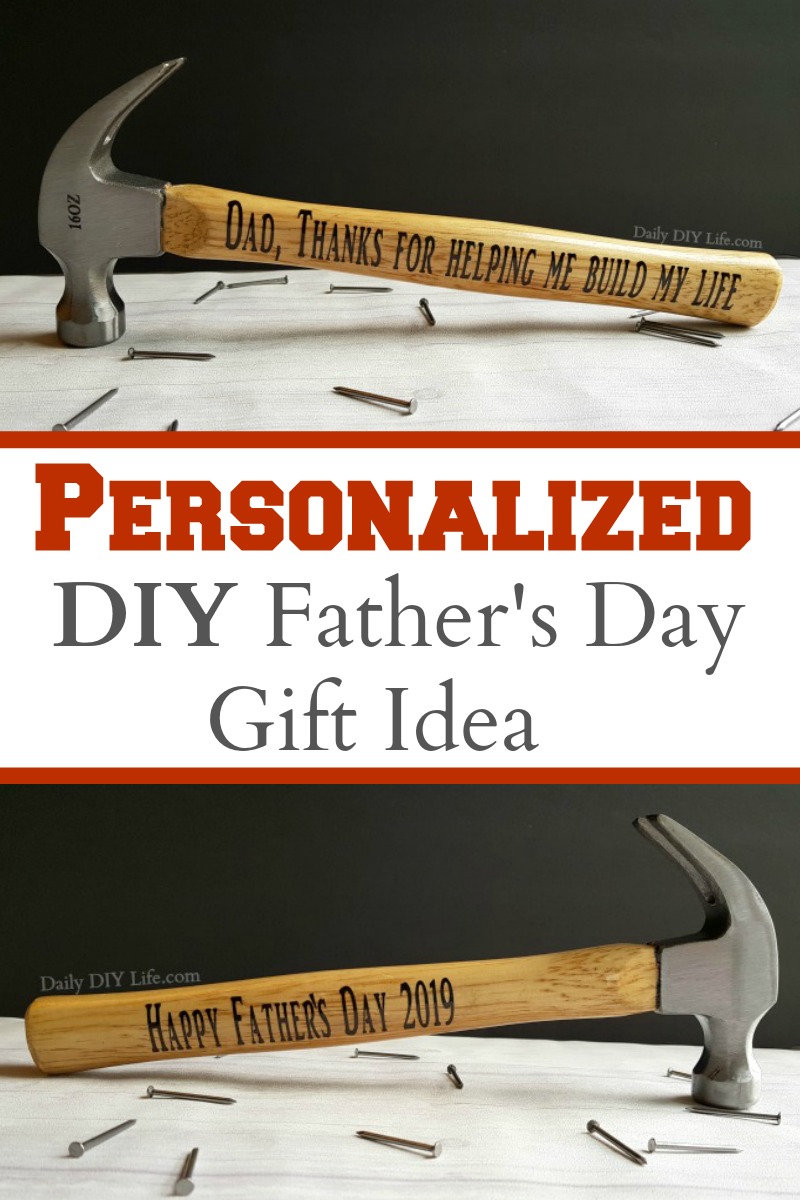
Start by making your quote, saying, or personalization in Cricut Design Space. I wanted to say something catchy since it was going on a hammer. “Dad, Thanks for helping me build my life” was just right.
On the opposite side, I went more traditional with “Happy Father’s Day 2019”
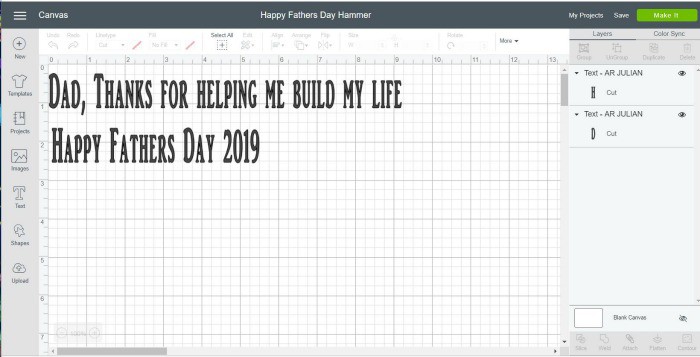
The font I used was AR Julian which I believe is a system font, not a design space font.
Make sure to measure your hammer and adjust the font size to fit. Mine was 9 inches long and just over 1 inch wide. Both phrases fit perfectly.
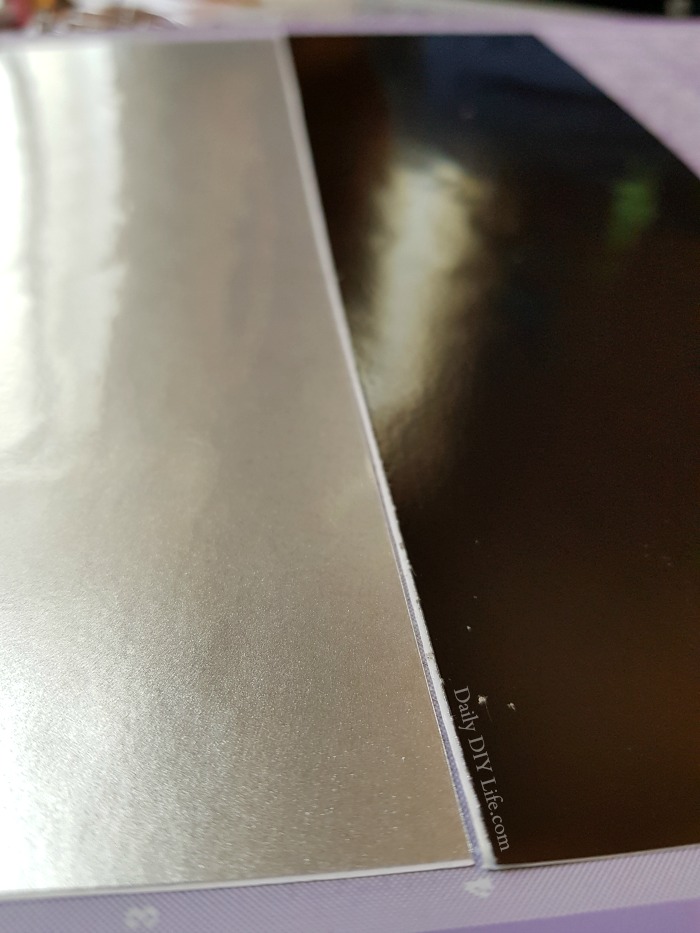
I cut my father’s day quotes using StyleTech Craft Polished Metal Vinyl. The look is sleek and more manly than glitter vinyl don’t ya think?
How To Apply The Vinyl
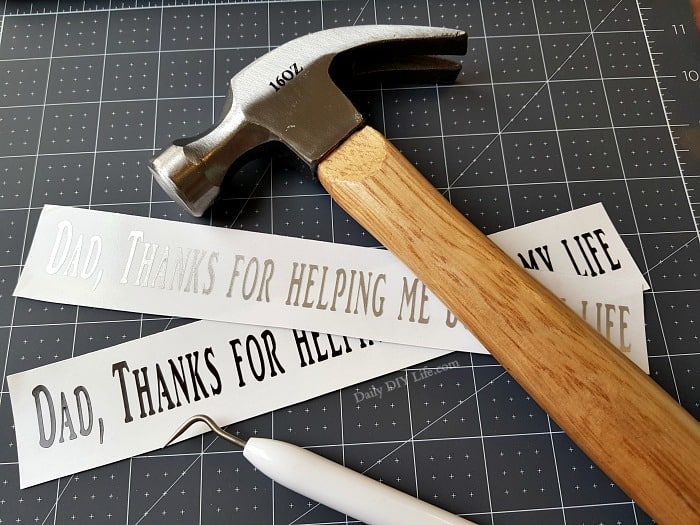
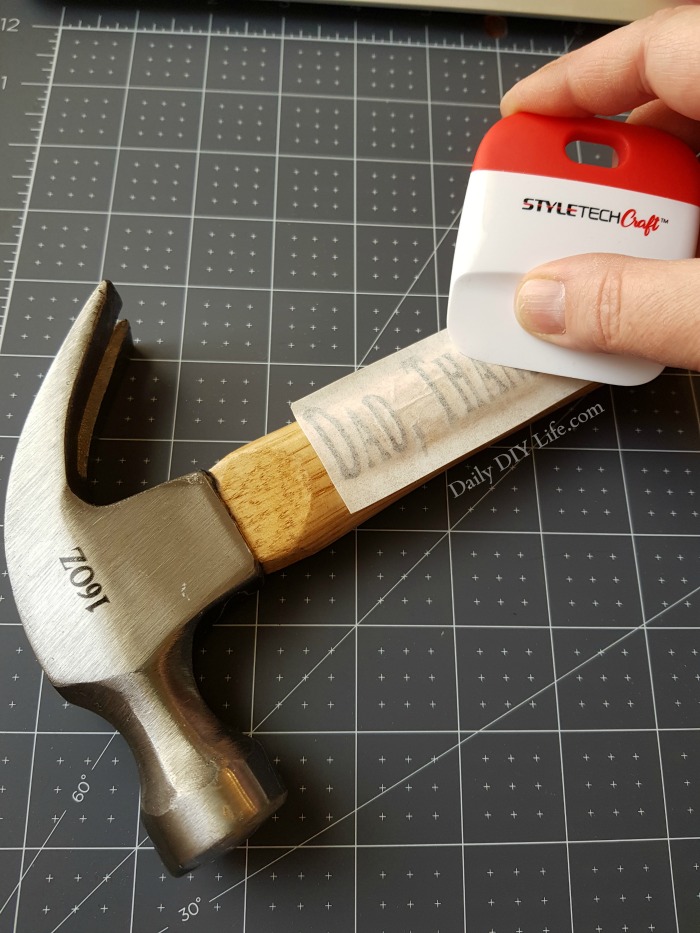
Once your phrase is cut and weeded, apply your transfer paper to the whole design. Use your scraper tool to make sure the vinyl sticks to the transfer tape really well before pulling it from the backing.
Remove the backing and transfer your design to the handle of the hammer.
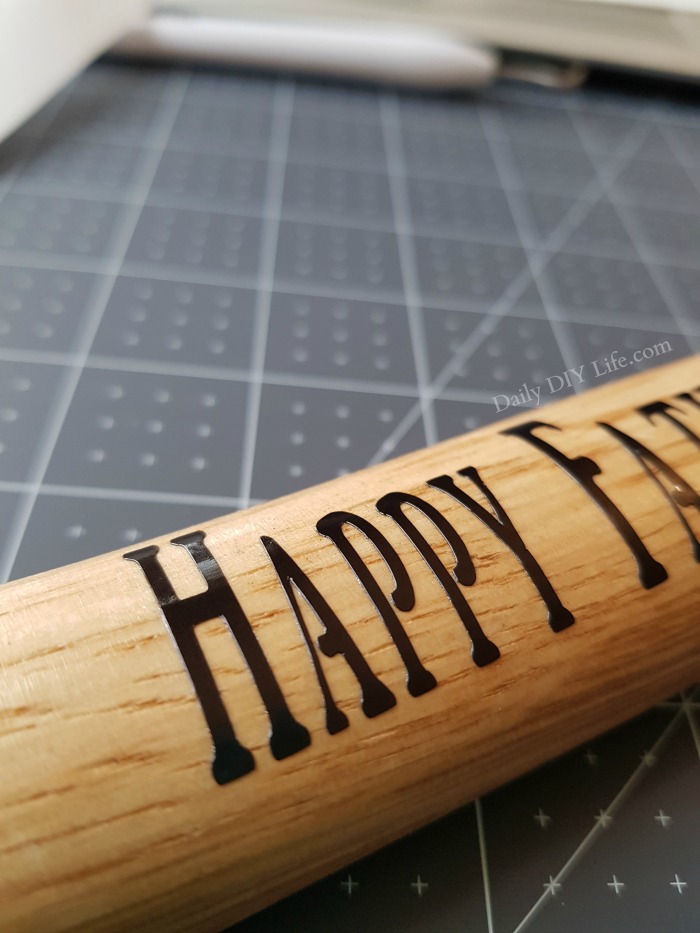
Give it a good press, just to be sure there are no edges lifting or pieces out of place. The polished metal vinyl is a bright metallic-looking film that will add a shine and a pop to the hammer. (It is also available in THIRTEEN different colors!)
I hope you have enjoyed this project. If you did, please drop a note in the comment below. I would love to hear how you personalized your own father’s day gift.
Don’t forget to Pin It For Later using the image below!
If you loved this project, you will also love:
DIY Farmhouse Indoor Herb Garden


This is just so fabulous that my heart started beating a bit faster 🙂 We are planning some house renovations for our new family home and this will just be the perfect gift. I haven’t used my Cricut cutting machine for a wee while, but I think it is time to pull my baby out and get crafting – thanks for the inspo!