
I’m so excited to share this DIY Photo Frame with you!
Want a creative personalized way to show off the ones that you love?
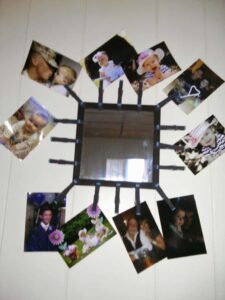
Why not create your very own photo mirror to display those wonderful snapshots!
It’s very simple, customizable, and best of all very affordable!
Using dollar store items and a little craft paint, you can make this one-of-a-kind beauty…Let’s get started!
SUPPLIES YOU WILL NEED:
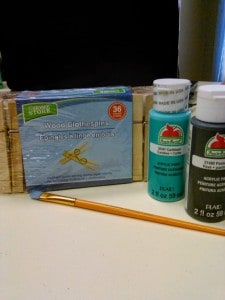
1. Mirror w/frame (I have seen square and round mirrors at the dollar store…use whatever you like the best)
2. Wooden clothespins
3. Craft paint in your favorite colors (One color for the base color and as many accent colors you choose)
4. Paintbrush(es)
5. Glue gun and glue sticks
6. Your favorite photos
Paint your wooden clothespins with your main color all over. Don’t forget the insides as well…having the raw wood show kind of throws off the look.
Once your main color is dry start adding your accent color(s)
I added just a small stripe on the tips and in one of the grooves on the end of the clothespin. Let that dry completely.
If the mirror you choose has a different color frame from your color scheme..go ahead and paint it now… Just be sure to let it dry fully before going on to the next step
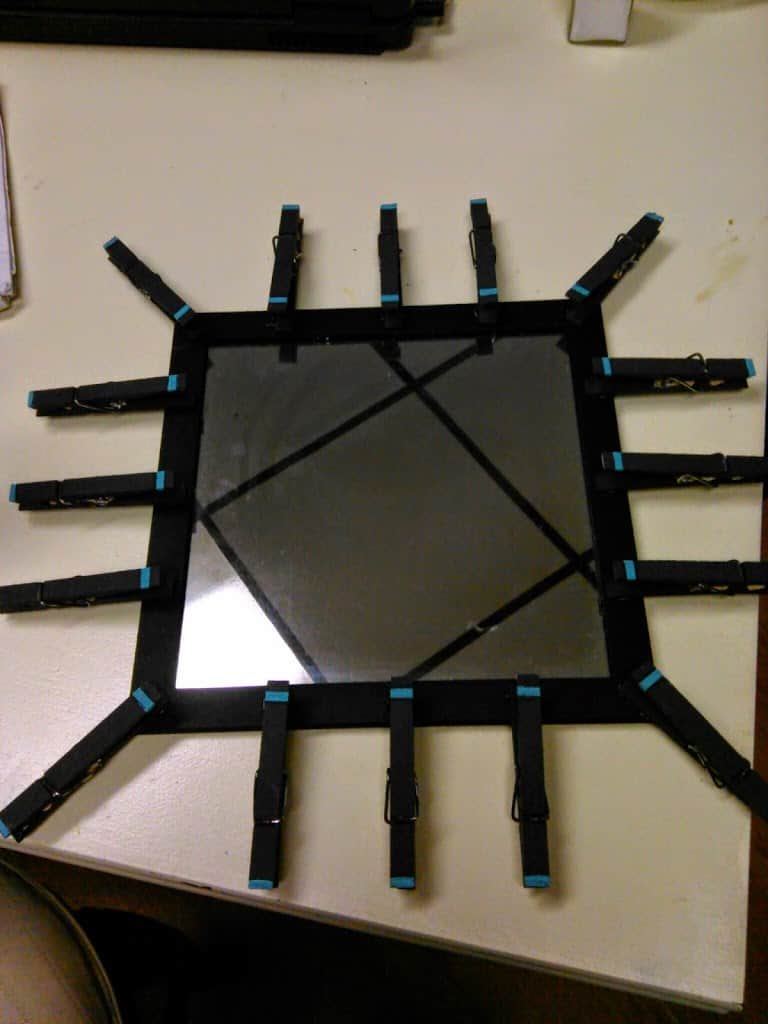
Time to glue… I used 15 pins around my square mirror. Just make sure they are spaced evenly for a finished look. Glue down your pins with just a dot of hot glue. If you use too much it will glob over the sides and look tacky (haha …tacky…glue…get it! …never mind 🙂
And that’s it! Voila! Your very own customized photo mirror.