

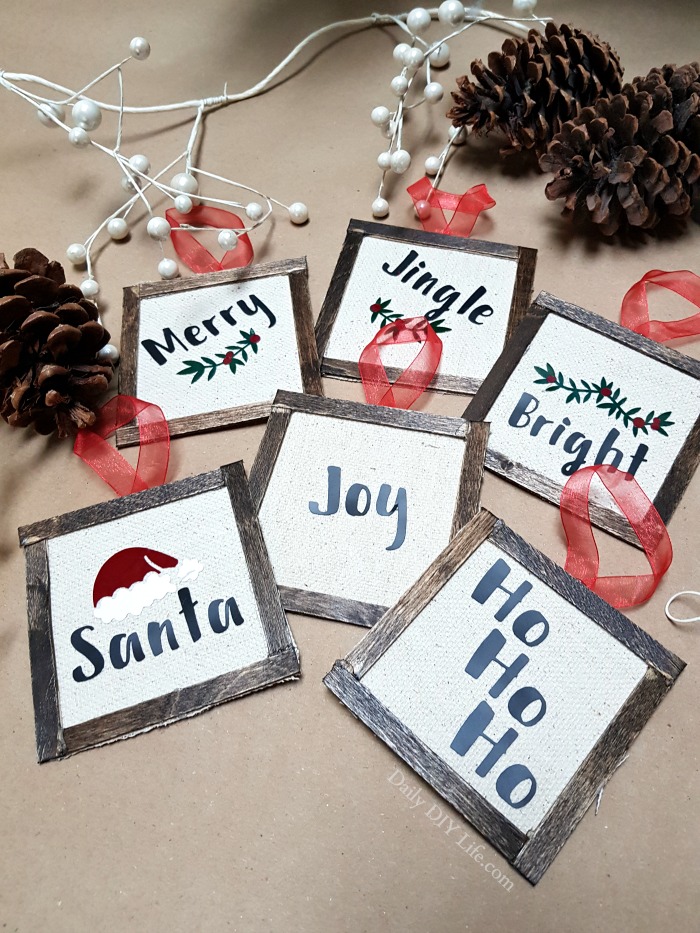
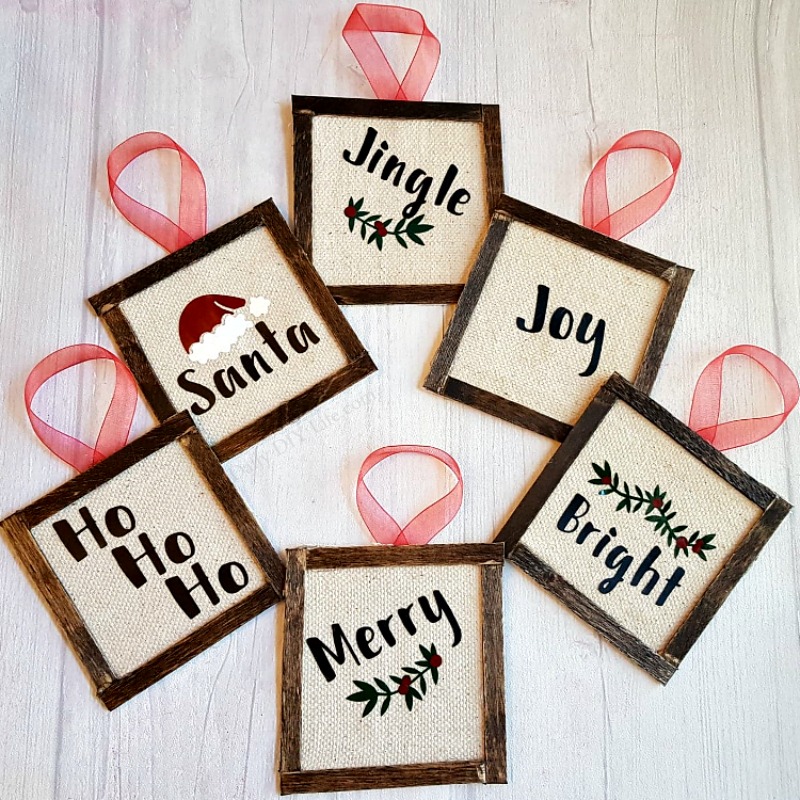
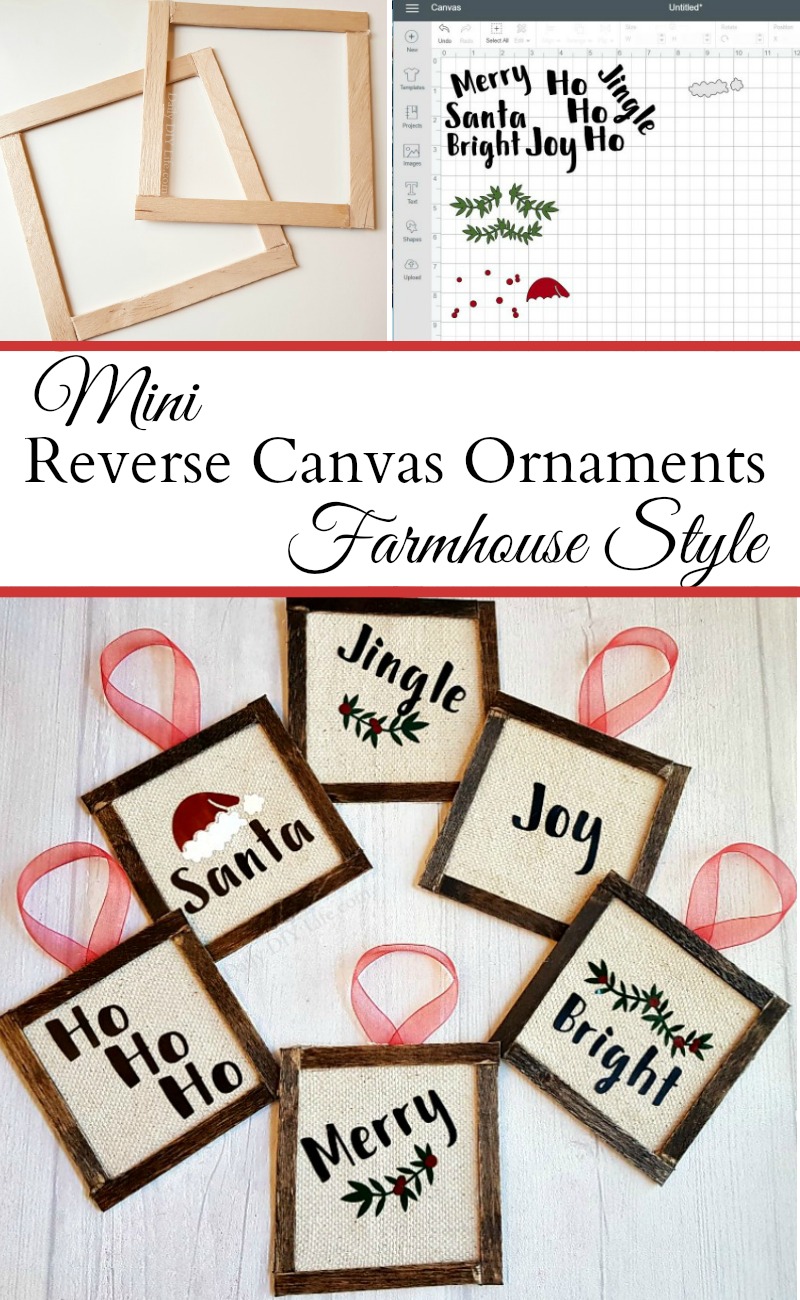
Add a touch of farmhouse style to your holiday decor with these easy to assemble Mini Reverse Canvas Ornaments. Using your Cricut cutting machine and a few supplies you probably already have around the house, you can put these adorable ornaments together in no time. They are completely customizable too!
Mini Reverse Canvas Ornaments – Pin It For Later!
Follow Daily DIY Life on Pinterest!
Craft & Create With Cricut Monthly Challenge
This post is part of the Craft & Create With Cricut Monthly Challenge. This month I have joined up with 10 very talented bloggers to bring you our best Christmas/Holiday Crafts using our Cricut cutting machines. I have linked to each project at the bottom of this post. Take a look at all of their amazing Cricut projects. We have some very talented ladies in this group.
Find your decorating style
From classic to modern and everything in between, decorating for the holidays doesn’t have to be what is “in” what is trending or even what your mom thinks is the best. Decorating for the holidays should be what makes you happy, and feel all the joy of the season.
For me, this year I am leaning towards a farmhouse/country style. Most of my decorations are modified (ahem..spray painted) from last years decorations. Mostly neutrals and black and white with touches of red here and there.
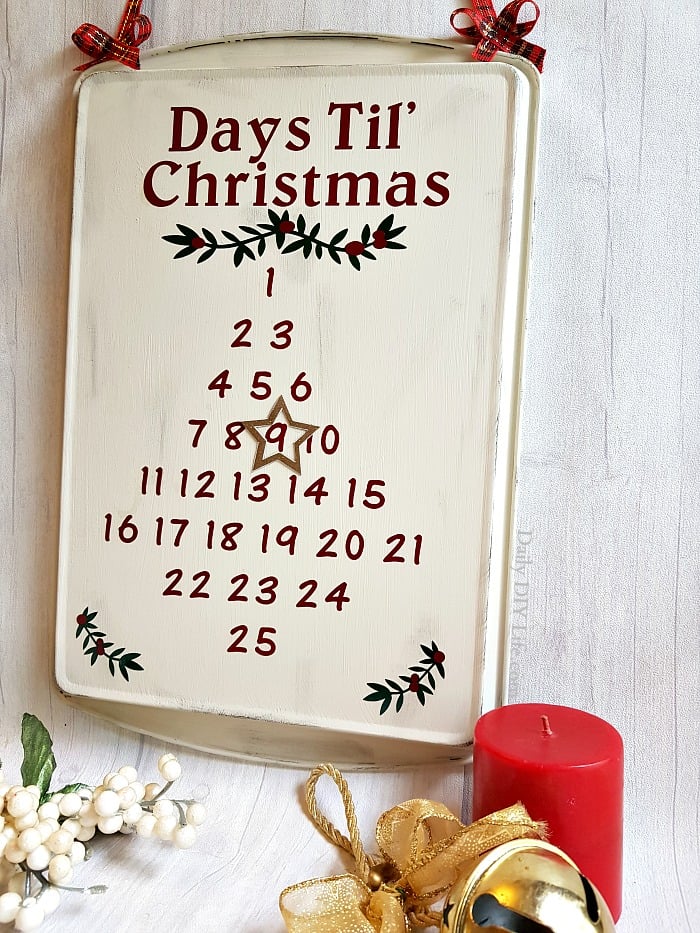
I started my Christmas crafting with the Rustic Farmhouse Style Christmas Advent Calendar. I loved the off-white rustic look with the dark red and green vinyl that I decided to carry it over to my ornaments for this months challenge. Just wait til’ you see how easy they are to put together. I had all six of them done in about an hour. That included waiting for the stain to dry. You’re going to love it.
This post contains affiliate links for your convenience. That means that if you click on a link in this post and a purchase is made, we will receive a small commission at no extra cost to you. For more details, please see our Disclosure Policy.
Mini Reverse Canvas Ornaments
Supplies:
- Small Craft Sticks

- Wood Stain or Craft Paint
- Scissors
- Painters Drop Cloth or Canvas Fabric
- Hot Glue
- 651 Vinyl – I use StyleTechCraft Gloss Vinyl in Black, Burgundy, and Dark Green
- Ribbon for hanging

 or Craft Paint
 or Canvas Fabric
 – I use StyleTechCraft Gloss Vinyl in Black, Burgundy, and Dark Green
Directions:
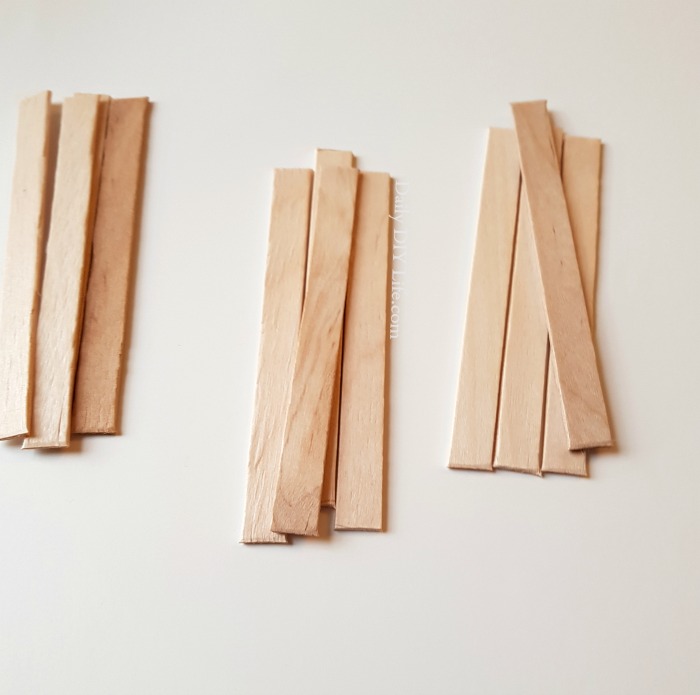
I wanted my ornament to be 4 inches squared, so I cut my popsicle sticks 3 1/2 inches long. I simply marked them with a pencil and cut the rounded ends off using a good quality pair of scissors.
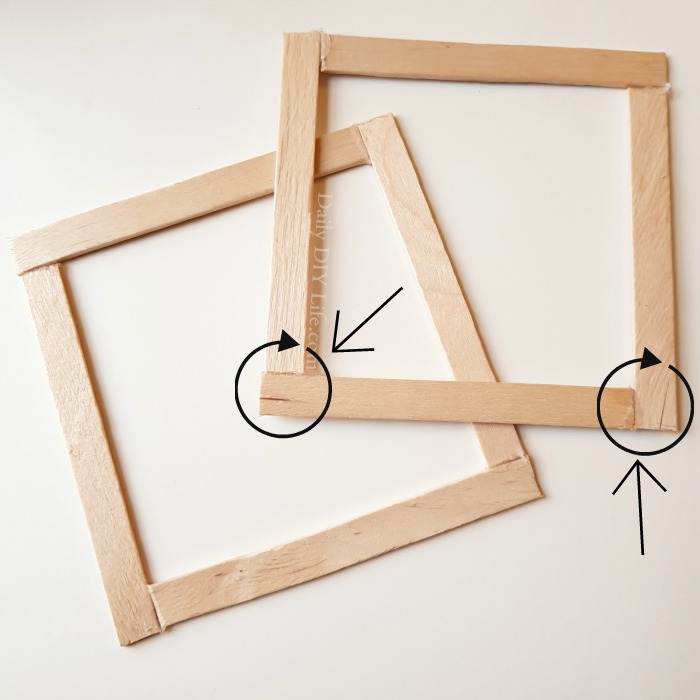
You can see in the photo above how I glued them together so they lined up to be a perfect square. I just used hot glue to hold the wood together. You can use E6000 glue if you want a more secure hold. I was impatient and didn’t want to wait for the glue to dry so I went with the trusty hot glue gun.
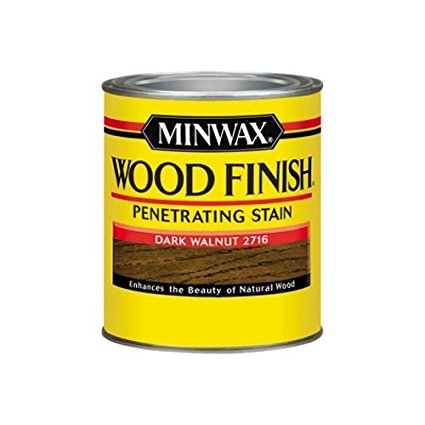
Stain or paint the wood using your favorite product. I used Minwax Wood Stain
 . It dries quick enough for this project once the excess has been wiped off. I waited about 20 minutes or until it was dry to the touch.
A traditional Reverse Canvas uses a premade canvas that is disassembled and put back together in reverse order. Since we are making these mini reverse canvas ornaments from scratch, I decided to use painters canvas drop cloth  as my backing. It’s affordable, and you can get a lot of uses out of just one package.
Cut six 4 inch squares from your drop cloth fabric.
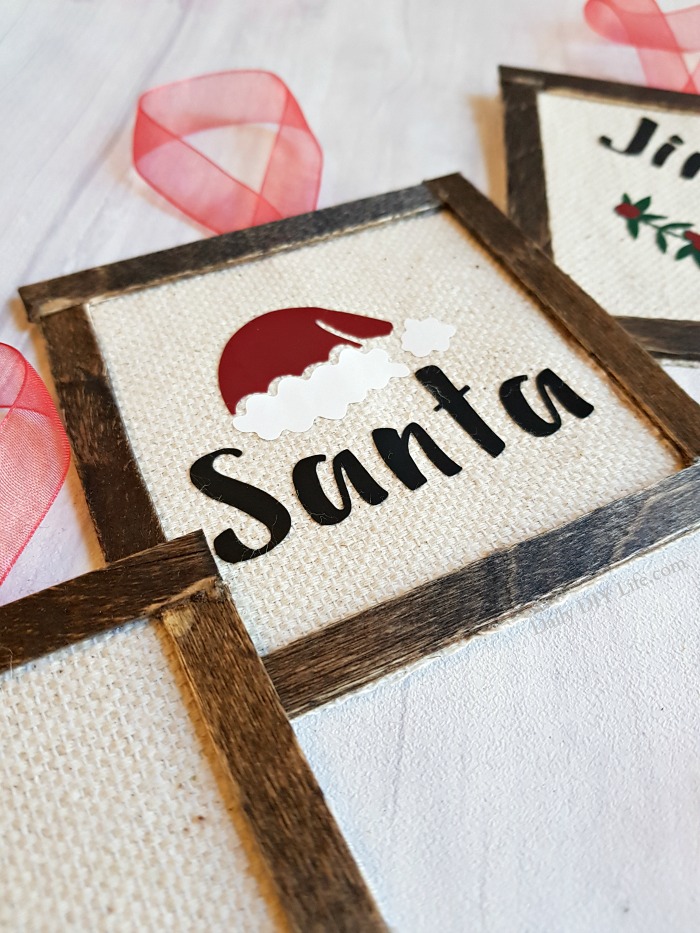
Assemble Your Ornaments
Hot Glue the 4-inch fabric to the back of the square. Trim off any excess around the edges.
Glue the ribbon to the back of the ornament for hanging.
Designing in Cricut Design Space
If you have the Cricut Access membership, you can open and use the file I created in Design Space for this project HERE. If you don’t have Cricut Access, you can create your own cut file in design space. The font that I used for this project is Karley, it is included in Cricut Access for free.
Cut All Your Colors At Once
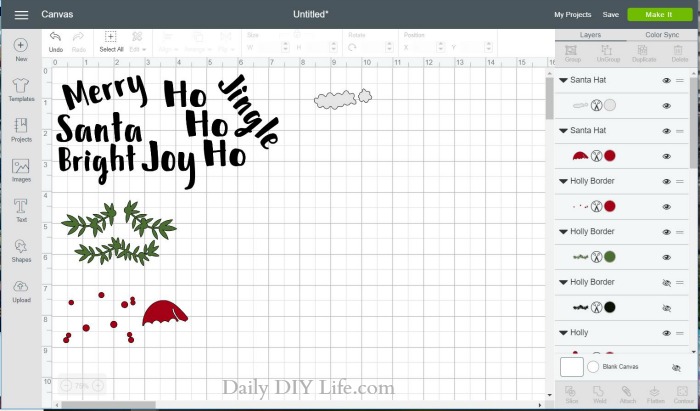
When I am working on a small project with multiple colors I try to get all the colors arranged on the same mat. You can see my example above. Group each color together and measure and cut your vinyl the size needed for each color.
Click SELECT ALL on the top taskbar, then click attach. This will keep each image exactly where you have placed it, and it will cut the same on your mat.
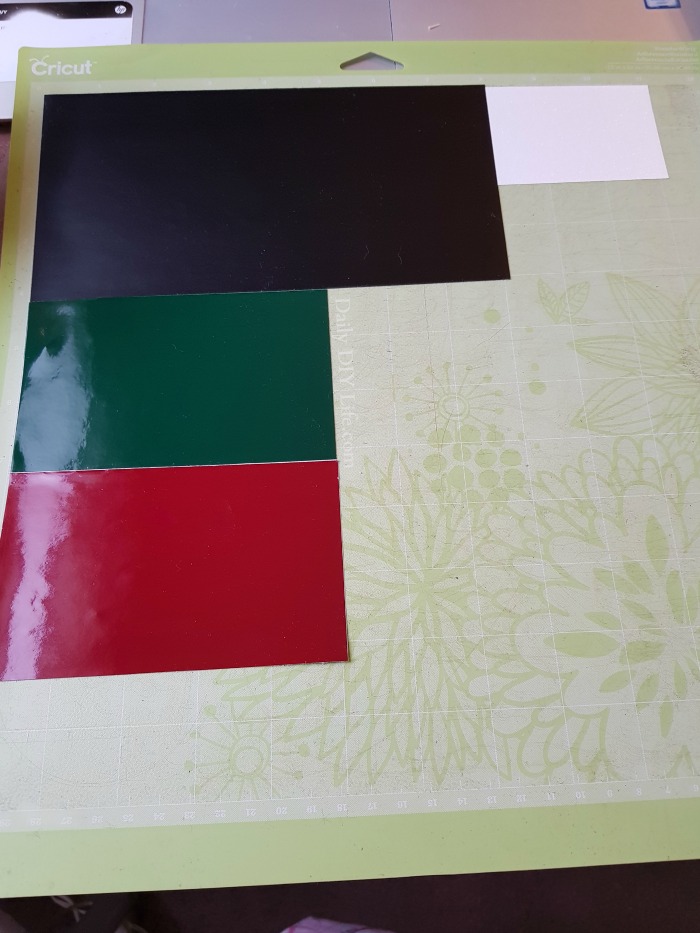
Place your vinyl on your mat corresponding to the images in design space. Cut your design. This also saves on vinyl, and you only use what you actually need. Less waste is always good.
Transfer your design to your Mini Reverse Canvas Ornaments using transfer tape and your scraper tool.
This can also be done using HTV (heat transfer vinyl)  if you are a fan of that look. If you choose to use HTV, be sure to apply your design before assembling the ornaments.
I hope you like this quick and easy farmhouse style Christmas craft. Drop me a comment below if you decide to give it a try.
Craft & Create With Cricut Monthly Challenge!
Before you leave, don’t forget to check out all of the amazing Cricut Christmas crafts from this months challenge. Just click the links below the image to visit each one.

Watch Me Whip Oven Mitt Gift Idea / Make Christmas T-shirts with Cricut / Rae Dunn Inspired Christmas Signs / Mini Reverse Canvas Ornaments / How to Use Cricut Maker and Chalk Couture to Make Christmas Ornaments / Painted Chipboard Christmas Wreath / Days Until Santa / Glitter Cardstock Gift Card Holder / Believe in the Magic Gift Bags /Easy-to-Make Christmas Tree Art /DIY Winter Wonderland Cloche (with FREE Cricut Cut Files)
Pin It!
Love this project? Don’t forget to pin it for later!


These are super cute! That’s a great way to do a reverse canvas.
I cannot believe how easy those are to make! I am pinning this for later!