
Is this not one of the cutest things you have ever seen? And its EDIBLE that makes it even more adorable!
My oldest son was stationed in Hawaii when they were expecting their first child. I lived in Massachusetts at the time, and just couldn’t get to them, or be a part of the baby shower they had out there in Hawaii.
So we decided to throw them a baby shower in Massachusetts. They were not there of course, but we had pictures, and video and presents! everything a baby shower could have. And we mailed it all to them. It was a lot of fun. What made this even more special to me was that when I was pregnant with him, I lived away from my family in Massachusetts, and they did the same thing for me. Had a full all out baby shower and video taped it as if I was right there with them.We made our own tradition I do believe.
My aunt Vicki (SHOUT OUT TO AUNTY VICKI!! WOOP WOOP!) made this adorable baby stroller fruit bowl for the shower. It was such a huge hit. She did such an amazing job. I thought I would share the How to with all of you. It really does make a statement, and is so eye catching.
You will need:
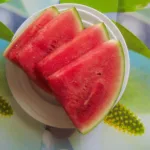
Watermelon – oval ones work better than round seedless ones but it would still work with those.
Cantaloupe
Green or Red grapes
Blue berries
Strawberries
4 orange slices (for the wheels)
4 kiwi slices (for the wheels)
*You can use any fruit you like inside the carriage
6 toothpicks
sharp knife
To assemble:
Slice a small amount off of the bottom of your watermelon so it does not roll around on the table while you are working.
Make one slice a couple inches off the center of your melon. But only go half way through.
Make another slice going horizontal across your melon also only going half way. Until the 2 slices meet. You should now have 1/4 of your watermelon separated from the main piece.
Using a melon baller (or a knife) remove the inside flesh part of the watermelon and reserve in a bowl. Don’t forget the flesh from the part you have already removed. Chop or slice the rest of the fruit you choose. Cover, and set it in the refridgerator until needed.
Using the 1/4 piece that has been removed from the melon cut a 2 inch slice from the longer edge. You can get fancy with this and make it with a design also if you like. I think the simple round handle is just as beautiful.
Using a sharp knife make a zig zag pattern around the edges of your carriage. Try using a cookie cutter or a biscuit cutter if the edge is sharp enough to go through the watermelon rind.
Discard any unused piece of rind.
Slide your handle inside the open end of your hollowed out watermelon at a slight angle and secure the ends with a toothpick on both sides.
Attach an orange slice and a kiwi slice using a toothpick to both side in place for the wheels.
And fill with your favorite colorful fruits.
Thats all it takes! It’s a pretty easy project and a great centerpiece idea for your food or dessert table.
There are many versions of baby carriage fruit sculptures all over pinterest. You can really made this as simple or as elegant as your time allows. Give it a try at your next shower, Your creation will be the talk of the town 🙂
New to Daily DIY Life? Start HERE